Rhubarb Clafoutis

Welcome spring! Since today is officially the first day of spring, I thought I would post a recipe with flavors that take me back to the springs of my childhood. You see, one of my great grandparents was Scotch and another was an immigrant from Germany. I therefore grew up eating rhubarb from the moment it was ready to harvest each spring.  I remember walking through the damp green grass in my rubber boots while holding the hand of my grandmother on the way to the big rhubarb plants on the far side of her yard.  My grandmother would then reach down with a big kitchen knife and slice off a few stalks for me to carry back to the kitchen. I would then don an apron and stand with her in the kitchen while she turned our little harvest into rhubarb sauce or rhubarb custard pie.

After living overseas with other people from around the world, I realized that some people have never heard of rhubarb, let alone ever eaten it.  While living in Belarus, I noticed it grew wild along the road, but few people knew how to prepare it. It is understandable that many people from warm climates have never seen it in the market because rhubarb prefers cool climates — like Scotland, Germany, and the Pacific Northwest where I grew up.

Technically, rhubarb is a vegetable, but it is most often prepared in a way that would be traditionally used for fruit.  That is simply because it is very tart and requires sugar to be palatable.  In my family, the most popular dessert with rhubarb was rhubarb custard pie, but sometimes in Italy, I’m not fortunate to find enough rhubarb to make a pie.  This was the case recently, when I only had two cups instead of the three necessary for my grandmother’s recipe for rhubarb custard pie. So, what did I do?  I decided to make a clafoutis instead.  No, I had never tried it with rhubarb, but why not?  The main ingredients for clafoutis are very similar to rhubarb custard pie — eggs, sugar, cream and or milk, and fruit. For this preparation, rhubarb takes the place of traditional cherries in this French country dessert. Strictly speaking, if it is not made with cherries, a clafoutis becomes a flaugnarde when you substitute another fruit, but I’ll stick with the name clafoutis for my recipe just because it is more recognizable in English-speaking circles.

Well, I’m happy to say that it turned out well.  Plus, I think many of you will like this recipe since it is gluten free (cornstarch is the thickener), and it takes much less time than a pie since there is no crust.  If a pie scares you, this is a good place to start, and friends and family can’t help but be impressed when you make them a dessert with a french name! —

“What did you make for dessert?”

“Oh, I just made a rhubarb clafoutis.”

It’s as easy as this:

Preheat your oven to 350°F (about 180°C). Butter a 9-inch pie pan and set aside.

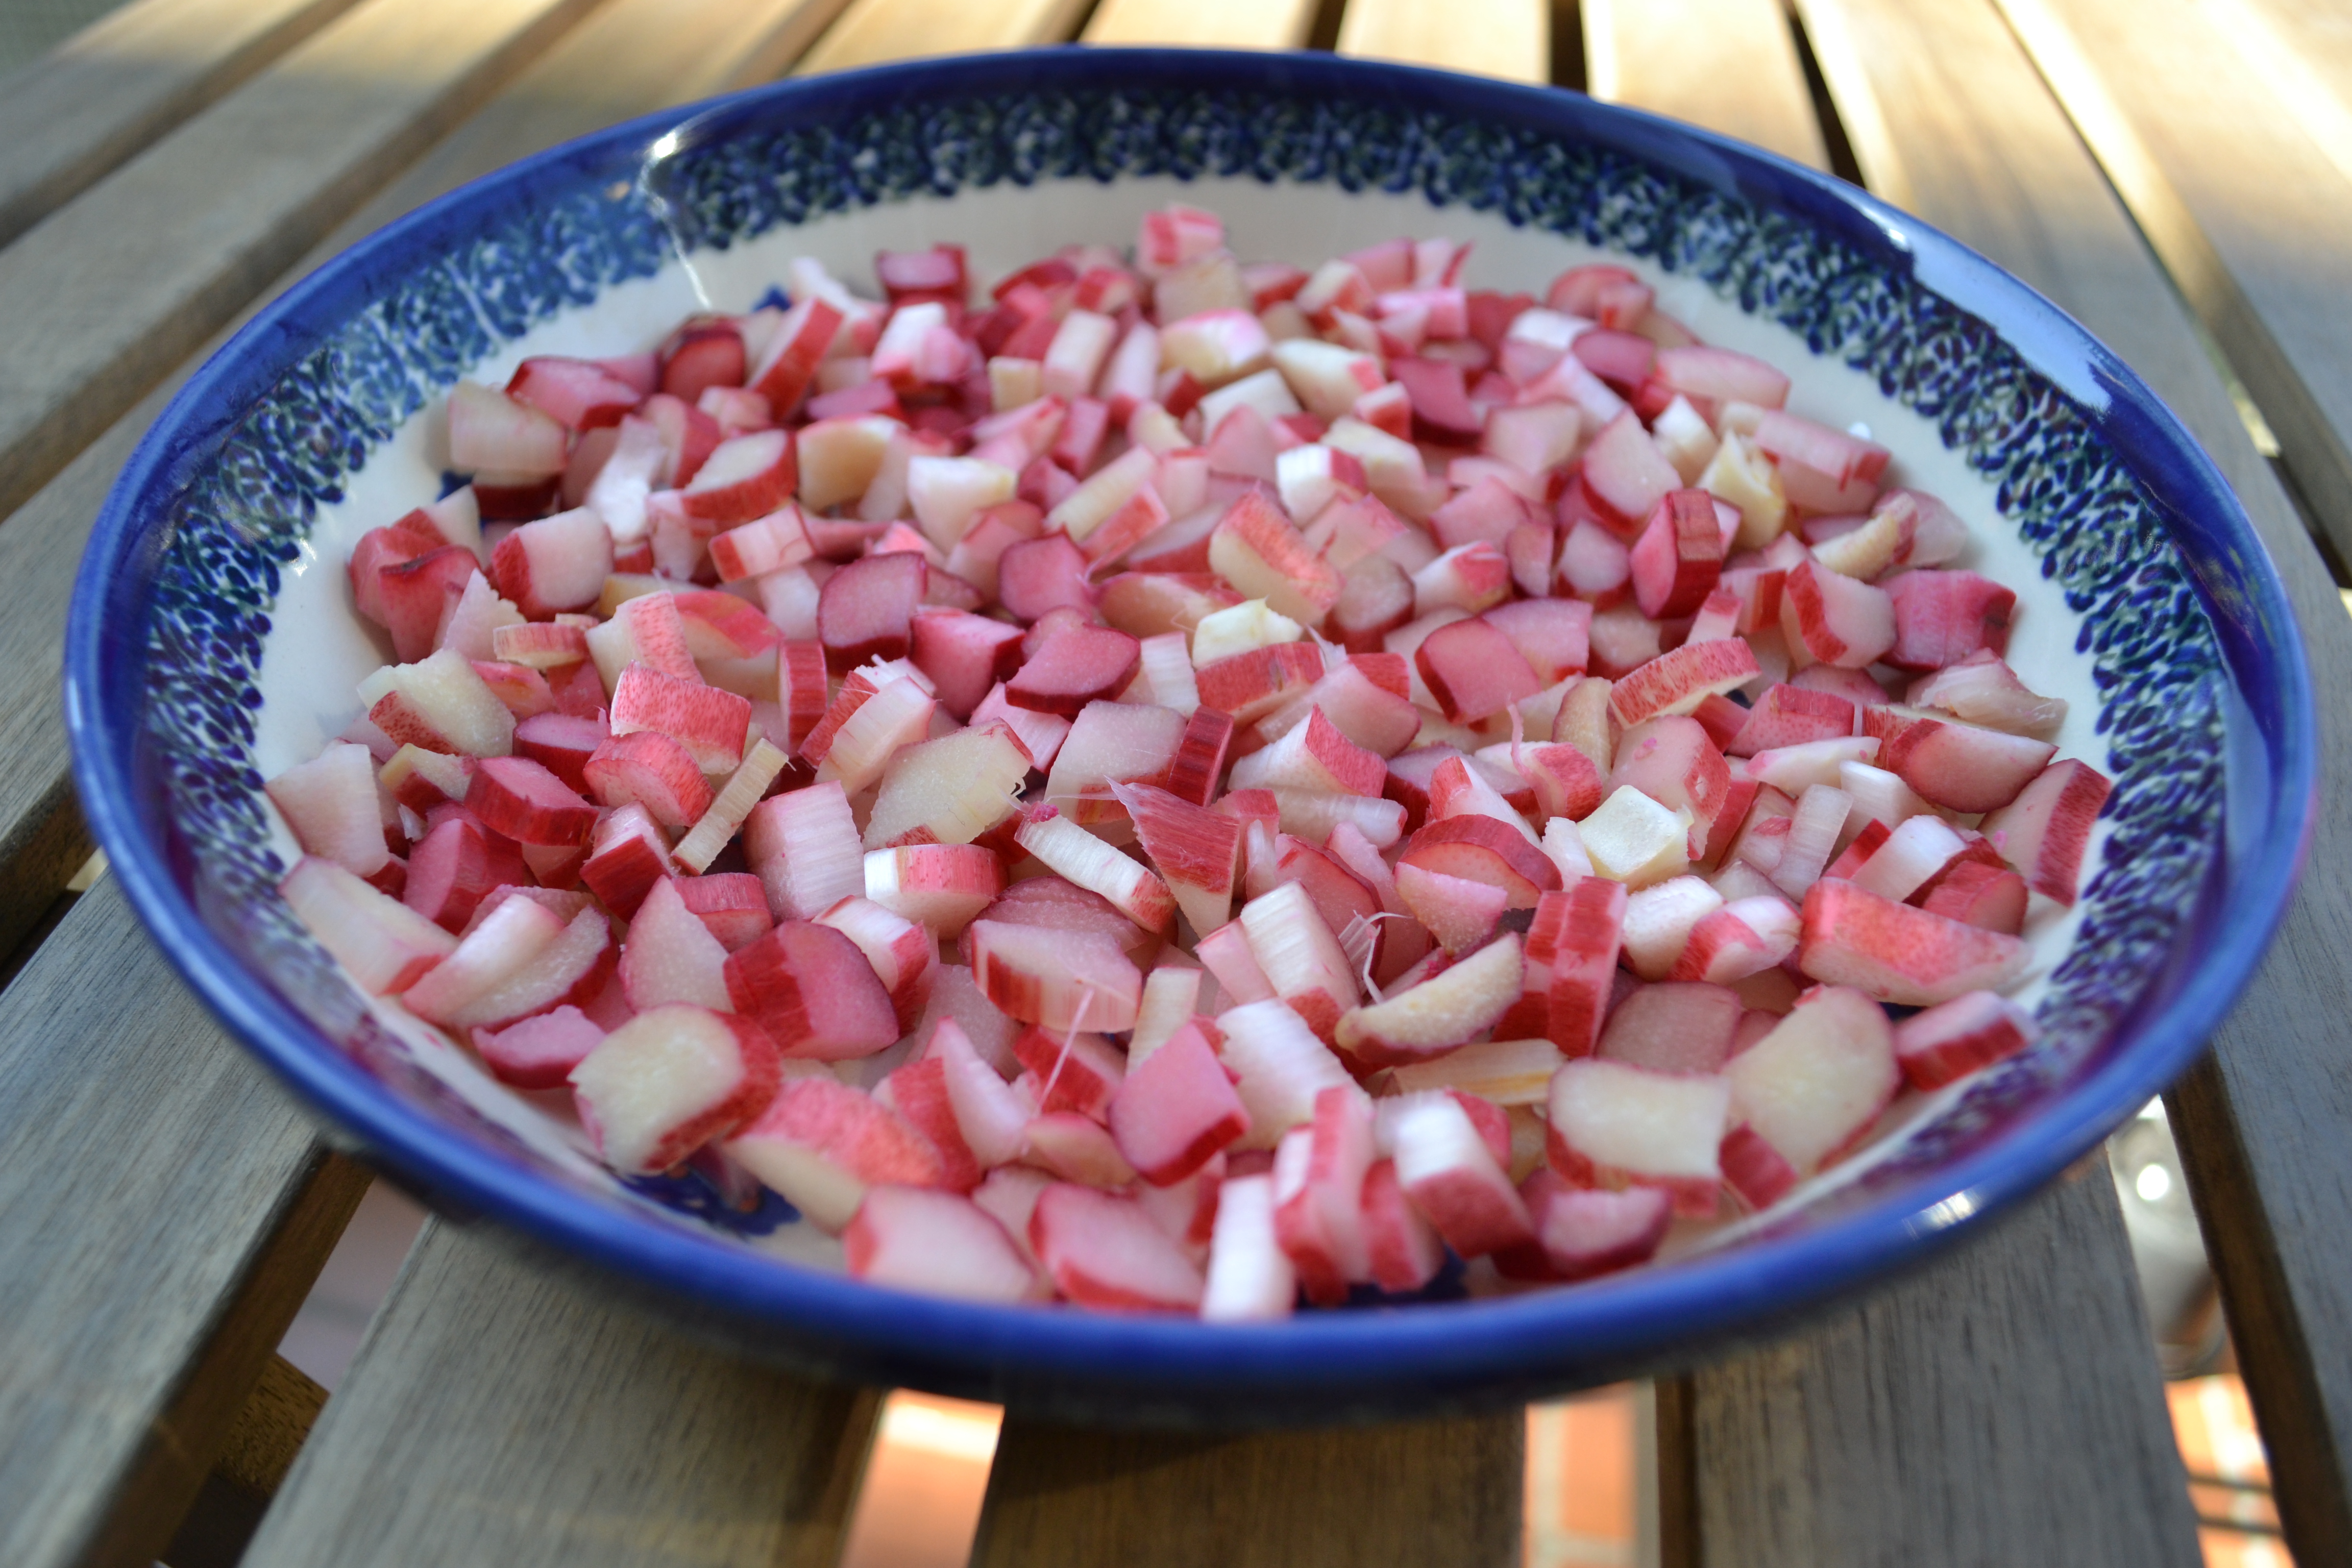
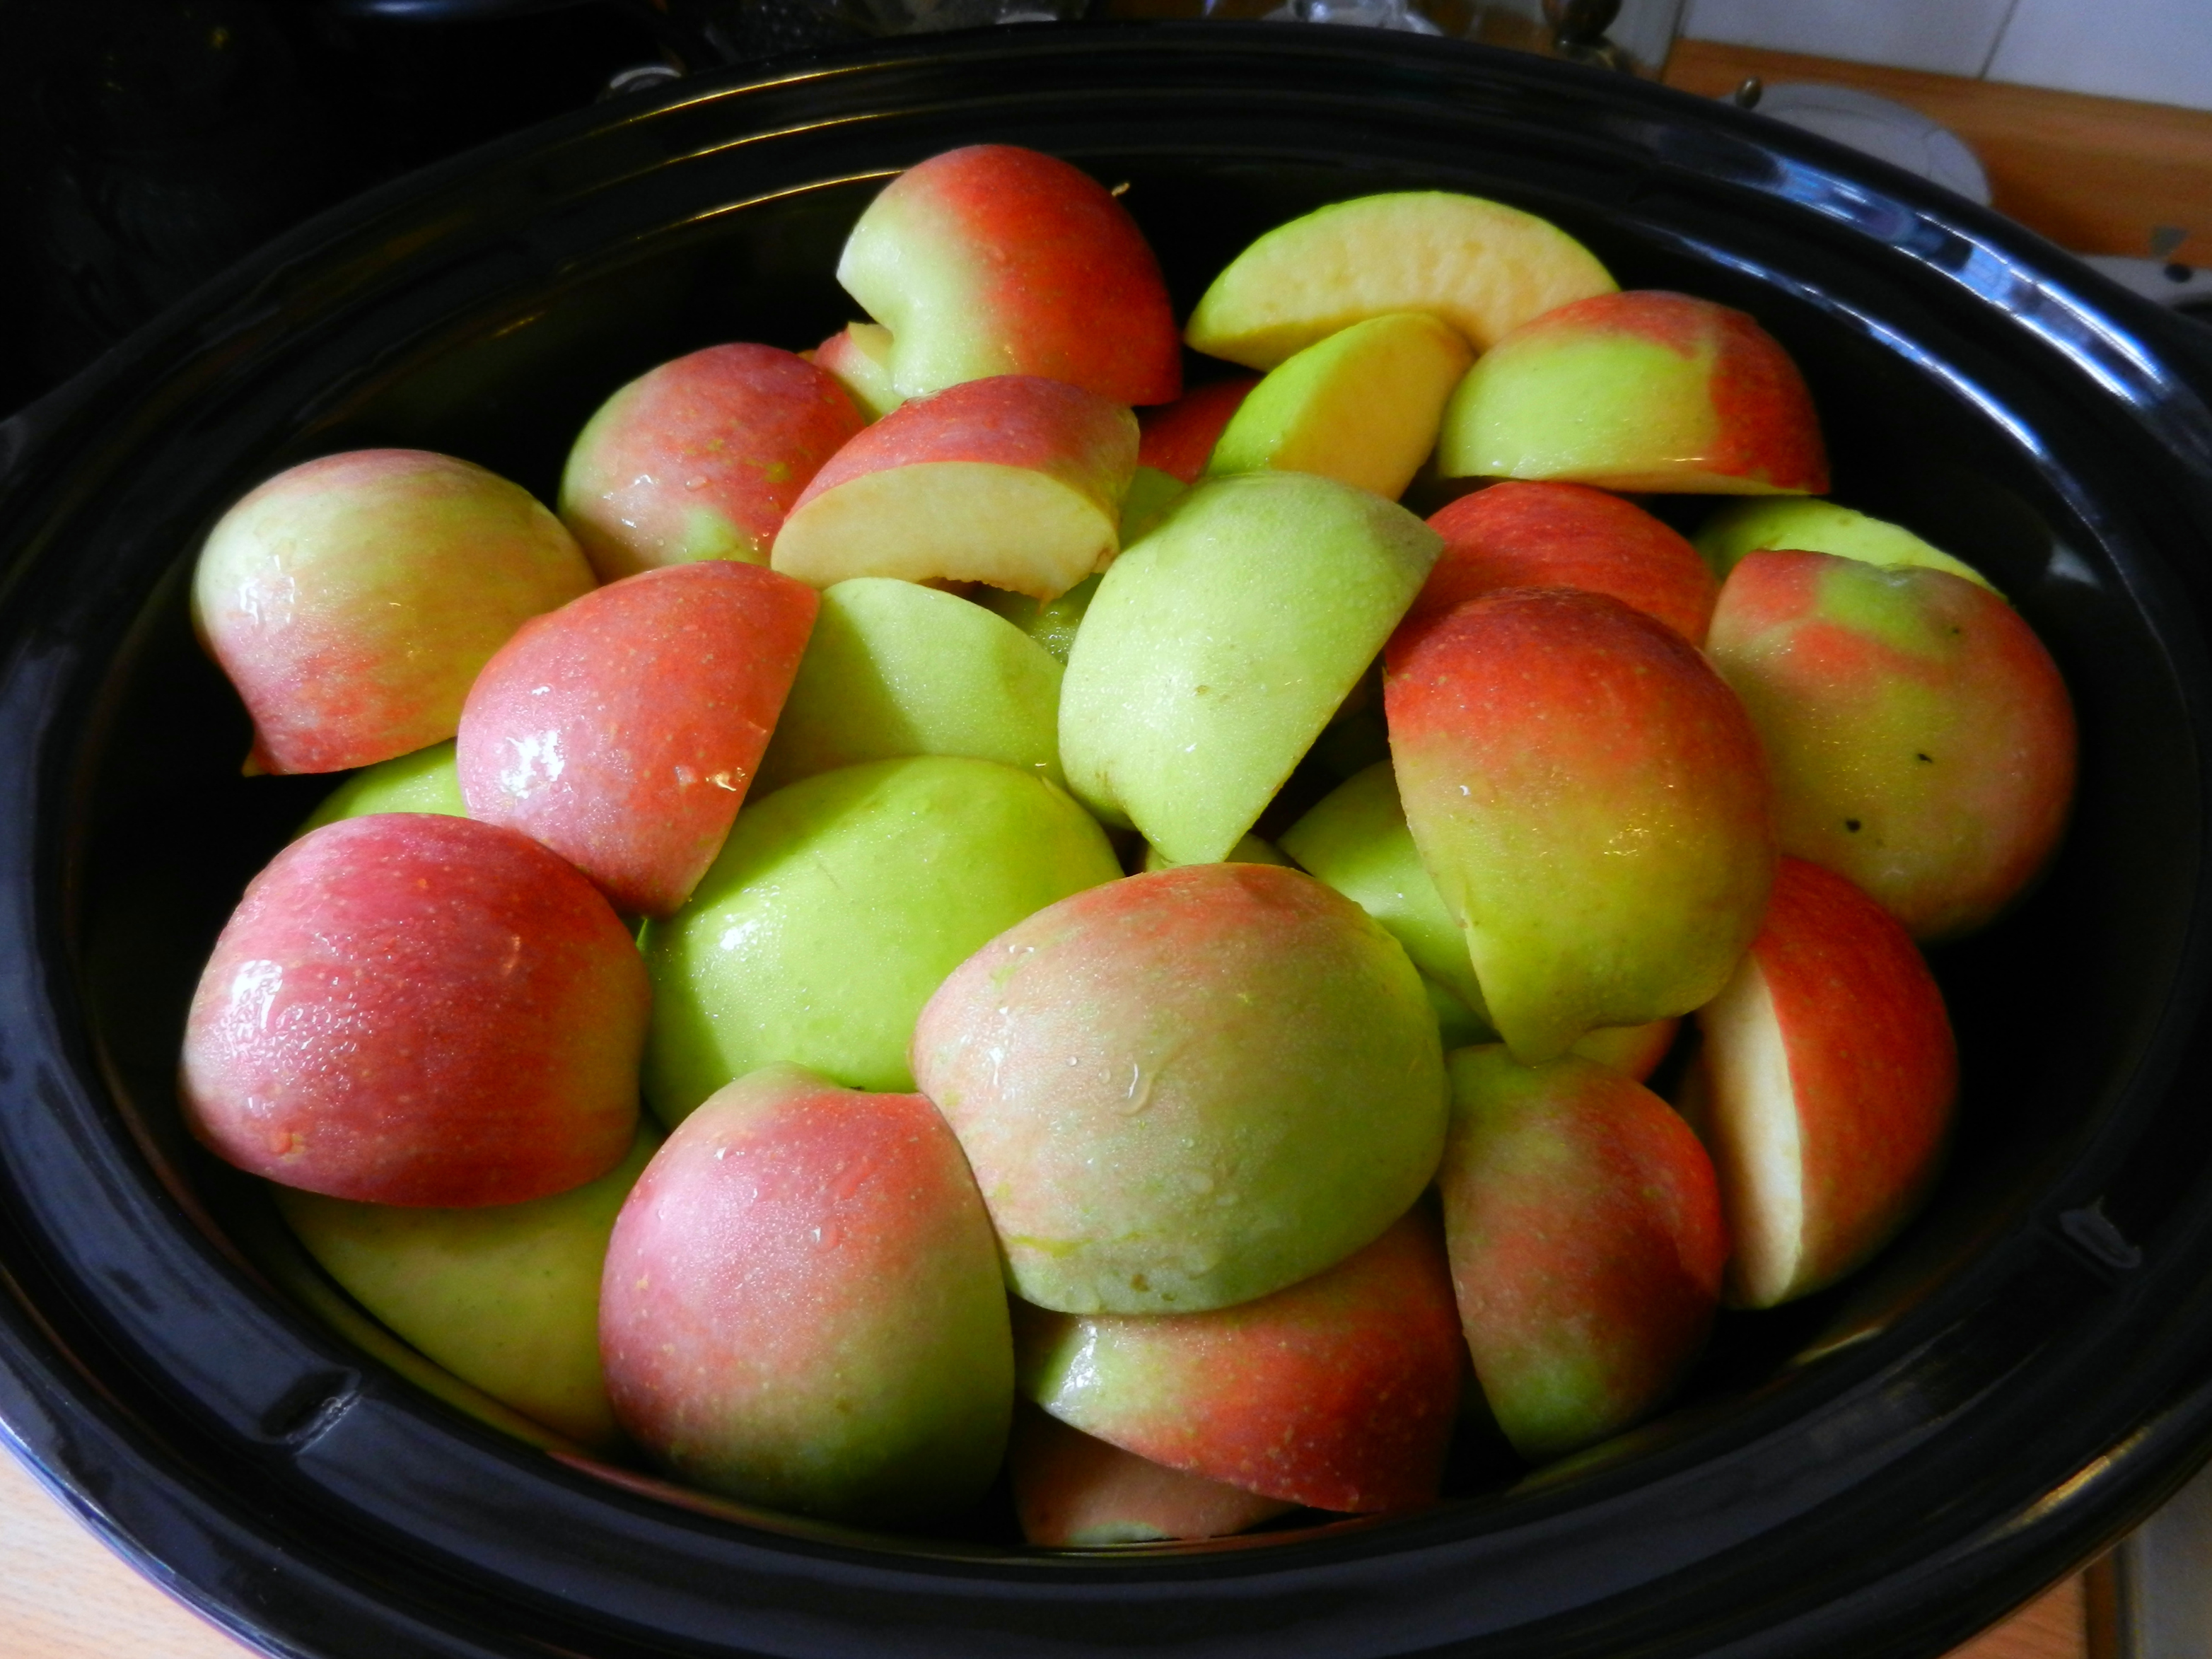
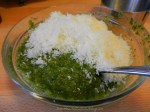
Wash the rhubarb to be sure it is clean. Pat it dry with a paper towel to make sure there is no residual moisture on the stalks. Now chop off the ends, making sure there is absolutely no part of the leaves left. (The leaves are poisonous.) Slice each stalk in half horizontally, just so it is easier to manage.  Now slice it again once or twice vertically before finishing the chopping process. In the end, you want to have pieces that are about 1/4 inch thick. Chop enough so you have about two cups.  Place the chopped rhubarb in the bottom of the prepared pie dish.

DSC_1532

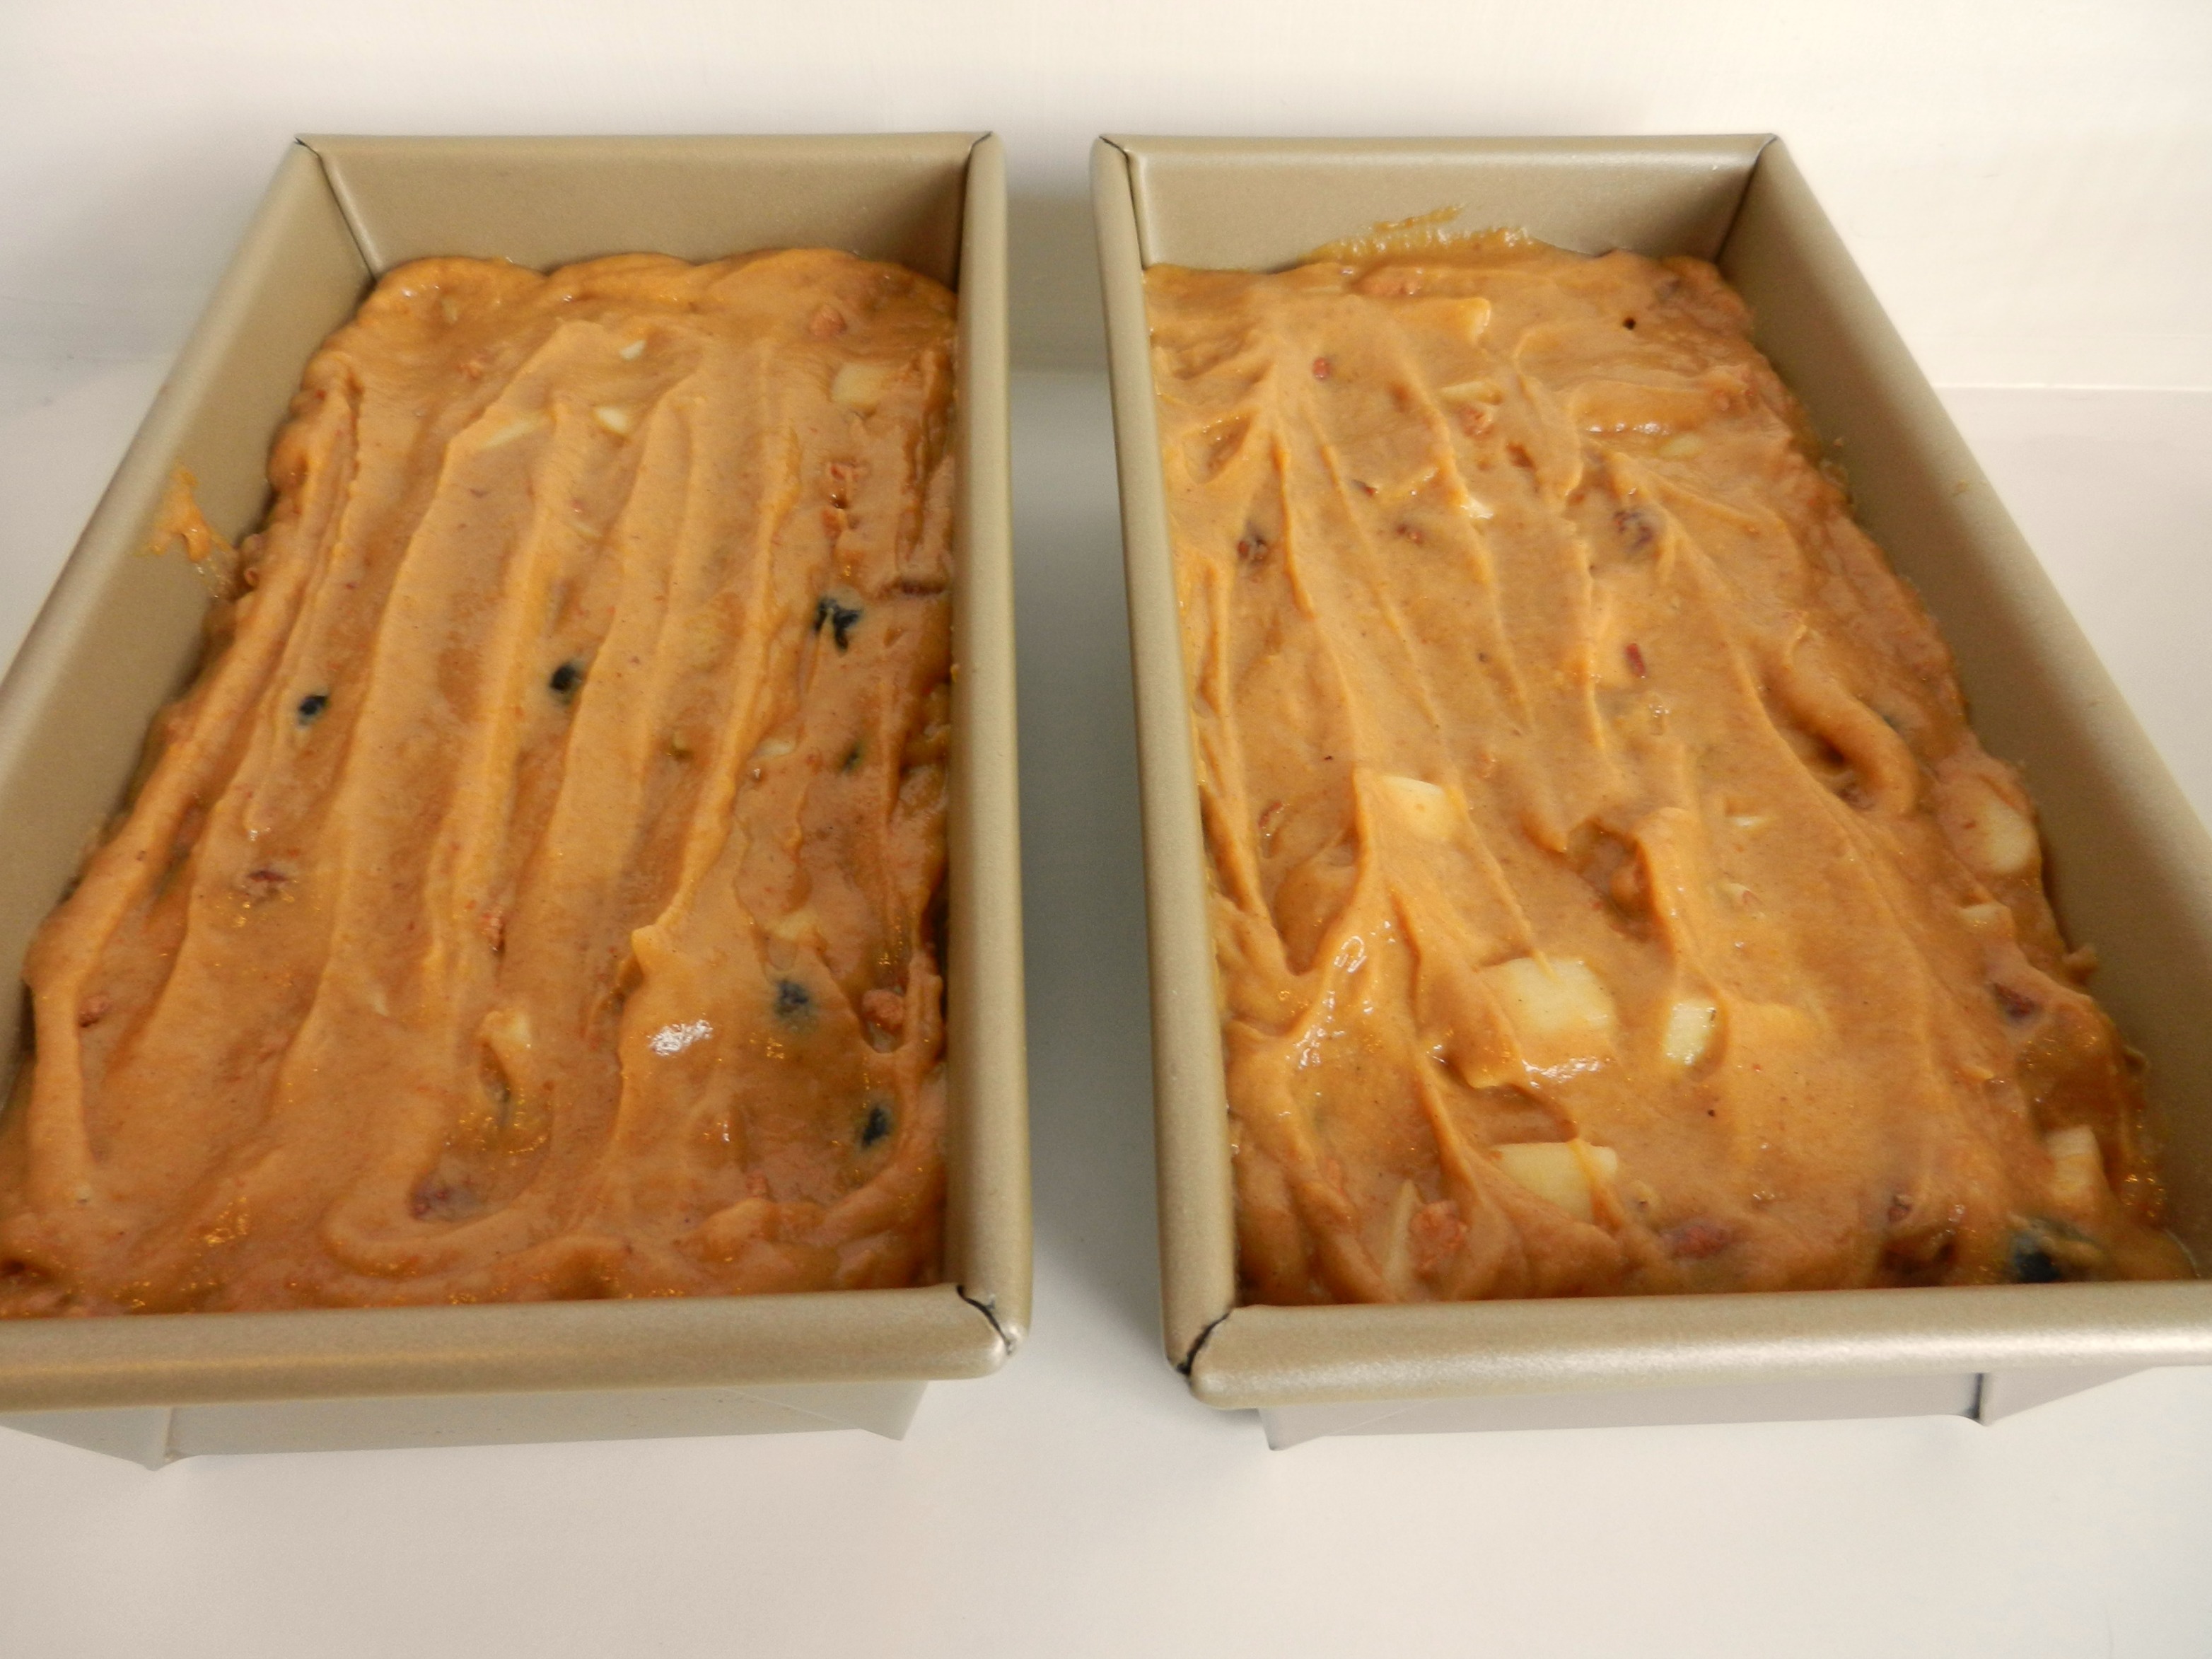
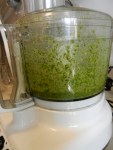
In a medium bowl, whisk together salt, cornstarch, and sugar.  You then whisk in some eggs, egg yolks, cream, and vanilla. Pour this mixture over the rhubarb waiting in your prepared pie plate.

DSC_1580

Place it in the oven for about 30-40 minutes.  The clafoutis is done when the center no longer seems “liquidy”. It should seem firm, but may move slightly like thick jello. It continues to cook just a bit once you remove it from the oven, so keep an eye on it so it doesn’t overcook.

DSCN7345

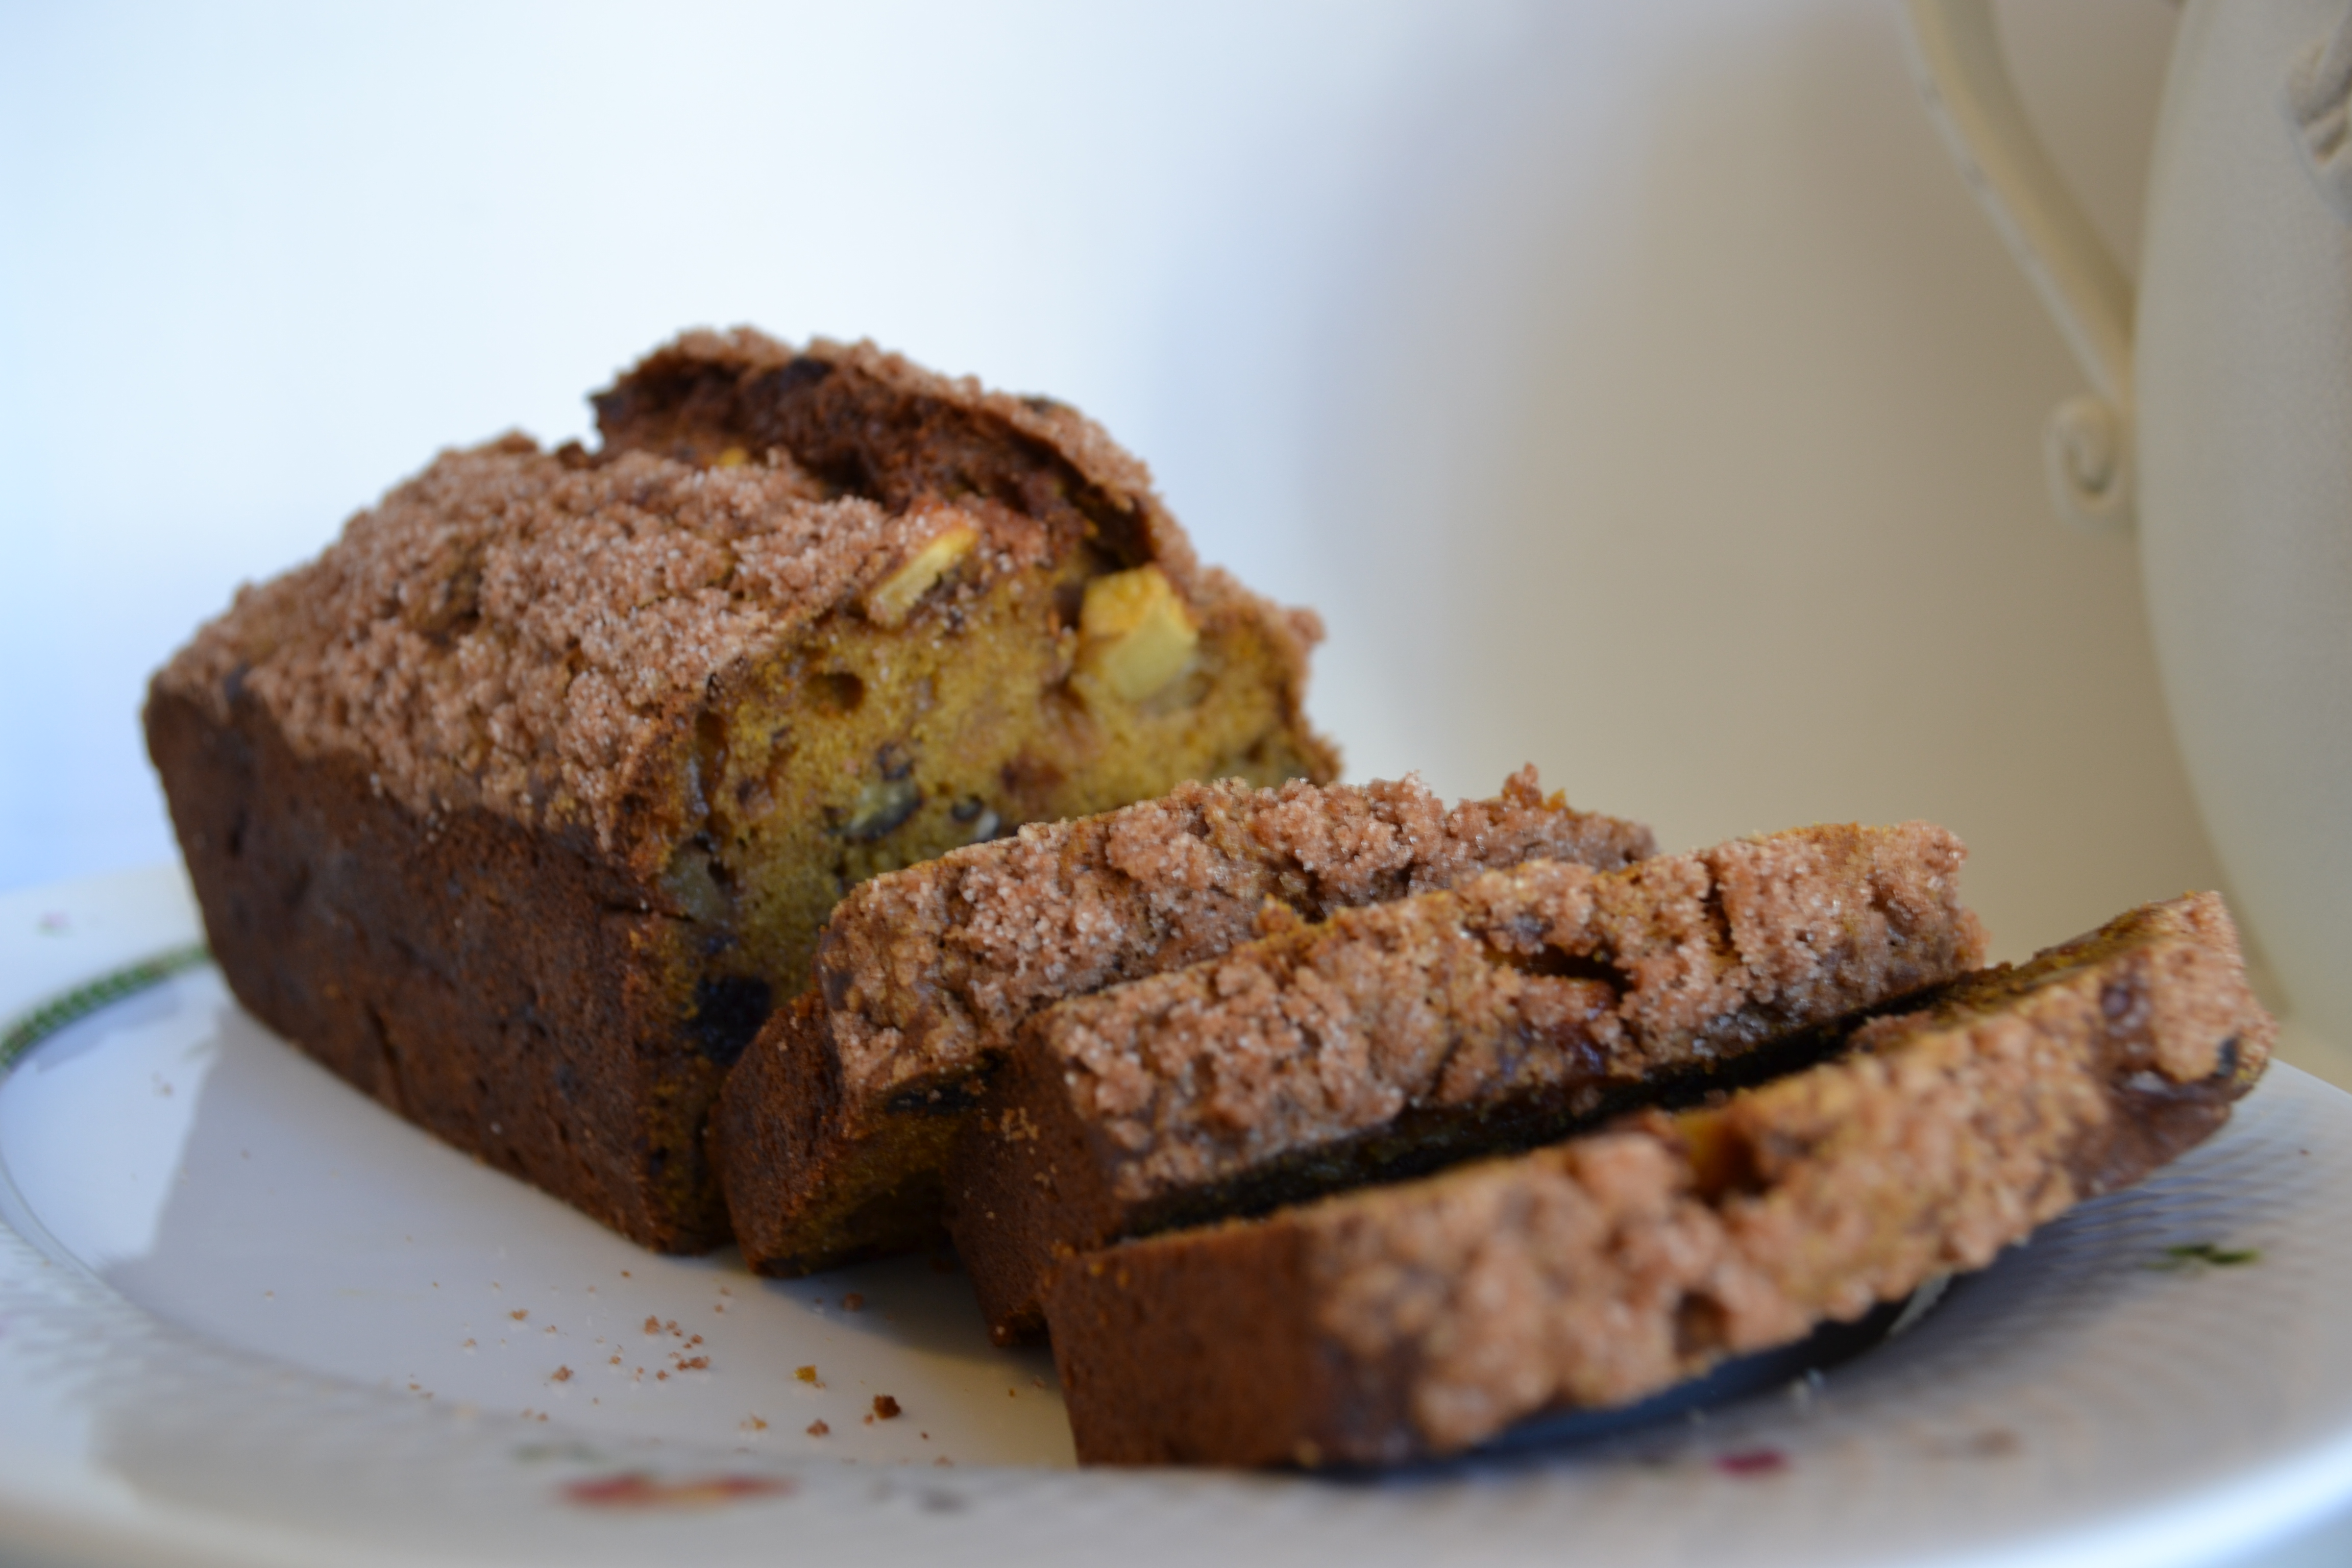
Set the pie plate on a rack to cool. Serve slightly warm dusted with powdered sugar.  If you feel really decadent, you can put a little crème fraîche, cream, or vanilla ice cream on the plate.

Rhubarb Clafoutis

  • Servings: Yields 8 servings
  • Difficulty: Easy
  • Print

rhubarb cover

Ingredients:

  • 2 cups chopped rhubarb
  • 1/8 tsp. salt
  • 2 tablespoons plus 1 teaspoon cornstarch
  • 1/3 cup sugar (2.3 oz.)
  • 1 1/4 cups (10 oz.) heavy cream
  • 2 eggs, room temperature
  • 2 egg yolks, room temperature
  • 2 teaspoons vanilla extract
  • powdered sugar for dusting

Directions: 

Preheat oven to 350°F (about 180°C). Butter a 9-inch pie dish and set aside.

Chop the rhubarb and place in the prepared pie pan.

Whisk together the salt, cornstarch, and sugar in a medium bowl. Whisk in the heavy cream, eggs, egg yolks, and vanilla.  Continue to stir until thoroughly combined and smooth.  Pour this mixture over the rhubarb in the prepared pie dish.

Place on the middle rack of the oven and bake for 30-40 minutes.  The custard should be mostly firm and a toothpick should come out clean.  Keep in mind that the custard will continue to bake and set a bit even after it is removed from the oven, so be careful not to over-bake it.

Allow the clafoutis to cool for 10-15 minutes before serving.  Dust with powdered sugar just before plating the slices.  Serve with a little crème fraîche or vanilla ice cream for an extra special treat!

Welcome spring!

How Do I Love Thee? Let Me Count the Ways…

Don’t give up on romance even if it’s the last minute.  Here is an idea that is easy and costs almost nothing — yet it’s sure to touch the heart of the person you love.

Elizabeth Barrett Browning inspired this idea through the poem she wrote during her courtship with her husband, Robert Browning.  They exchanged almost 575 letters between them during that time. Though she was English, Elizabeth moved to Italy immediately following her wedding and spent the remaining days of her life in Italy. Elizabeth loved her husband so much that she married him despite the protestations of her family. She gave up her home and her relationship with the rest of her family to be with the person she loved.

The full text of her poem is below:

How Do I Love Thee? (Sonnet 43)

by Elizabeth Barrett Browning, 18061861
How do I love thee? Let me count the ways.
I love thee to the depth and breadth and height
My soul can reach, when feeling out of sight
For the ends of being and ideal grace.
I love thee to the level of every day’s
Most quiet need, by sun and candle-light.
I love thee freely, as men strive for right.
I love thee purely, as they turn from praise.
I love thee with the passion put to use
In my old griefs, and with my childhood’s faith.
I love thee with a love I seemed to lose
With my lost saints. I love thee with the breath,
Smiles, tears, of all my life; and, if God choose,
I shall but love thee better after death.

Here is the project:

Find some sticky notes (I chose three shades of pink.) and write the reasons you love your someone on the pages. Place the pages on a mirror or a door in the shape of a heart where your special person is sure to see them.

closeup notes

Write the first lines of Elizabeth Barrett Browning’s famous poem on the mirror with some chalk paint, or use your word processing program to make a sign to go above the heart.

saying

I chose liquid chalk, as you can see.

How do I

This is a sample of how you could make a sign to go above the heart.  You could also just use the first lines.

full shot

You can see my finished product.  It was fairly quick, very inexpensive, and I’m sure my husband will appreciate the fact that I made something instead of buying a card. I don’t know about you, but I rarely find a card that says what I want it to say.

Below are some of the reasons that I love my husband.  You are welcome to borrow any of these lines, but I’m sure you’ll be able to personalize this idea with some of your own sentiments.

How do I love thee?  Let me count the ways…

I love you for taking out the garbage.

I love the way you sing in the shower.

I love you for being a good father.

I love you for being my best friend.

I love you for being faithful to your family.

I love you for helping in the kitchen.

I love you for taking the dog out every night.

I love you for always putting gas in the car.

I love you for working, even when you don’t feel like it.

I love you for taking me out to dinner so I can have a night off.

I love you for encouraging me to try something new.

I love you for thanking me when I make your lunch.

I love you for getting me groceries on short notice so I can finish a recipe.

I love you for making me popcorn.

I love you for inviting me to lunch.

I love you for being kind to my parents.

I love you for lending me your hankie when I cry.

I love you for driving when the weather is bad.

I love you for driving our daughter to her tests and taking a day off to do it.

I love you for going shopping with me even when you don’t like shopping.

I love you for going to church with our family.

I love you for your faith in Christ.

I love you for letting us travel.

I love you for learning how to ski just so you could ski with me.

I love you for giving me your umbrella when it rains.

I love you for always saying “goodbye” and “I love you” before you leave for work.

I love you for being a good son and calling to check on your parents on a regular basis.

I love you for always thinking I’m beautiful, even when I don’t feel like it.

I love you for telling me I look nice when I get dressed up.

I love you for always remembering my birthday.

I love you for getting excited when your team wins.

I love you for being willing to play board games with us.

I love you for your sense of humor.

I love you for loving me just the way I am.

Happy Valentine’s Day to All!

Lemonlicious Raspberry Muffins

Since Valentine’s Day falls on Saturday this year, why not make the someone or “someones” you love a special breakfast featuring these Lemonlicious Raspberry Muffins?  Lemons abound in Italy during this season, so I decided to forgo the traditional chocolate recipes and opt for a recipe with sunny lemons and some red raspberries for appropriate color. I think you’ll find the flavors of lemon and raspberry pair quite well in these muffins and make a great complement to a nice cup of tea. They are wonderfully tart, and the lemon brightens the flavor of the raspberries. Those who don’t like things overly sweet will love this recipe!

TeapotIt’s as easy as this:

Preheat your oven to 375°F (190°C).

In a bowl, combine the dry ingredients (flour, baking powder, and salt).

muffin flour

In a separate bowl, cream together the sugar and butter until it is nice and fluffy. Add the egg and the zest of one lemon. (I prefer the natural flavor of zest to extract.)

sugar mixtureLemon zest

You will find the texture to be a bit curdled-looking.

egg mixture

Measure out a cup and a half of fresh or frozen raspberries.  Put them in a bag with about a tablespoon or two of flour. Close the top and shake them around a bit. This process will keep the color from bleeding too much into the batter. Set the raspberries aside or put the bag in the freezer until you are ready to use them.

DSCN7110DSC_1021

Make a well in the dry ingredients. In the center, pour in the milk and the mixture of butter, sugar, egg, and zest. Stir a bit with a spoon or spatula, but DO NOT COMPLETELY COMBINE, or it will be to hard to stir in the raspberries. Fold in the raspberries and complete the mixing process, being sure not to overmix.

DSC_1030

Divide the dough into well-prepared muffin tins using a cookie or ice cream scoop. I used a non-stick spray that has flour in it and is made specifically for baking. Preparing the pan well is important because the topping can otherwise make these muffins difficult to remove from the pan.

Prepare the topping:  Place the sugar, colored sugar (if using), and butter in a bowl. Use a pastry blender or fork to combine. (You can also do this with a food processor, but I did it by hand because it’s a small amount.)

DSC_0996DSC_1015

Use a spoon to sprinkle the topping over the dough in the muffin tins.DSC_1066

Bake for 20-25 minutes or until a toothpick comes out clean or with a few crumbs.

Allow to cool in the muffin tins for 5 minutes.  Remove the muffins from the tin and place on a cooling rack — or you can put them on a plate for serving.  They are best warm but can also be eaten at room temperature if you choose to prepare them ahead of time.

Lemonlicious Raspberry Muffins

  • Servings: Yields 18 muffins
  • Difficulty: Easy
  • Print

Ingredients:Lemon Raspberry Muffins

  • 2 1/3 cups flour (11.5 oz. )
  • 1/2 tsp. salt
  • 4 tsp. baking powder
  • 1/3 cup sugar (2.25 oz.)
  • 1/4 cup (2 oz.) softened butter
  • 1 egg
  • zest of lemon (1-2 teaspoons)
  • 1 cup milk
  • 1 1/2 cups fresh or frozen raspberries (not in sugar syrup)

Directions:

Preheat oven to 375°F (190°C).

Place flour, baking powder, and salt in a bowl and stir with a whisk. In separate bowl, cream butter with sugar until light and fluffy. Beat in egg and lemon zest (mixture may look a little lumpy or curdled).  

Make a well in the dry ingredients. Pour the sugar mixture and milk into the center. Using a spoon or spatula, begin to gently stir together. Before completely mixed, stir in the raspberries.* Be sure not to overmix.

Topping:

  • 1/3 c. flour (1.5 oz.)
  • 1/2 c. sugar (3.5 oz.) or (1/3 cup sugar plus 3 T. coarse red decorator sugar)
  • 1/4 c. (2 oz.) softened butter

Use a pastry blender or fork to blend together the above ingredients. The mixture should be slightly coarse. (This step can also be done in a food processor by pulsing the ingredients.) Set aside.

Use a cookie or ice cream scoop to place the dough into 18 well-greased muffin cups. (I use the special baking spray with flour for easiest release.) Spoon some topping over each muffin.

Bake in a 375°F (190°C) oven for 20 to 25 minutes or until a toothpick comes out clean.

Remove the pans from the oven and allow to cool for 5 minutes.  Move the muffins from the tin to a rack or directly to a plate for serving.

*Before mixing into the other ingredients, put raspberries in a bowl or bag with one to two tablespoons of flour. Toss to coat.  (This will keep the berries from turning the batter completely pink.) If you are using frozen berries, you can put the flour-coated berries back in the freezer for a little while until you are ready to mix them into the batter.

If you happen to have any left over, you can put them in the freezer to use for another breakfast or for a treat with coffee or tea.  Teapot

Montefalco, Balcony Over Umbria

Those who know me, know I love to sing the praises of Umbria, Italy. As a region, it offers breathtaking landscapes of snow-capped mountains, green valleys, clear blue lakes, the tallest man-made waterfall in Europe (built by the Romans), religious and artistic treasures, as well as some of the best food in Italy (think chocolate, sausages, and black truffles). Best of all, Umbria is still slightly off the tourist radar. The region borders the ever-popular Tuscany and can easily be reached within a few hours from either Rome or Florence, but relatively few venture to its lovely towns, with the possible exceptions of Assisi and Perugia. Though I could devote an entire article to Umbria — and probably eventually will — one village in Umbria beckons me back over and over with its charm, glorious food, and spectacular views: Montefalco.

DSCN6448Montefalco perches atop a mountain overlooking much of Umbria. In fact, residents refer to it as “the balcony over Umbria.” The scarcity of large tourist hotels keeps the pace of life slow enough to experience la dolce vita away from the crowds while still allowing easy access to all the major points of interest in the area. Those who have the pleasure of an overnight visit awake only to the sound of church bells and birds, yet the view from this crow’s nest reveals Assisi (home of St. Francis), DSC_0212 (3)Foligno, Spello, and Spoleto, sitting picturesquely in the distance. All of these towns as well as Bevagna, Trevi, and the pottery town of Deruta can all be reached within 30 to 40 minutes, but in the evening, one can return to the tranquility of this mountaintop retreat to shop for linens or to taste the wide variety of local products on display in many of the local shops.

Wine connoisseurs may recognize the name Montefalco as a key growing and production area for wine. Vintners in the hills of Monefalco grow the once scarce sagrantino grapes, a variety that yields a wine bursting with tannins and the flavors of red fruits and spices. This grape comprises one hundred percent of the wine Sagrantino di Montefalco.  It must be aged at least 29 months (12 of which are in wooden barrels) — quite a bit longer than many reds. Montefalco Rosso, my particular favorite, is another local wine which is less expensive and usually combines sagrantino grapes with other varietals, mainly sangiovese and merlot.

Montefalco 
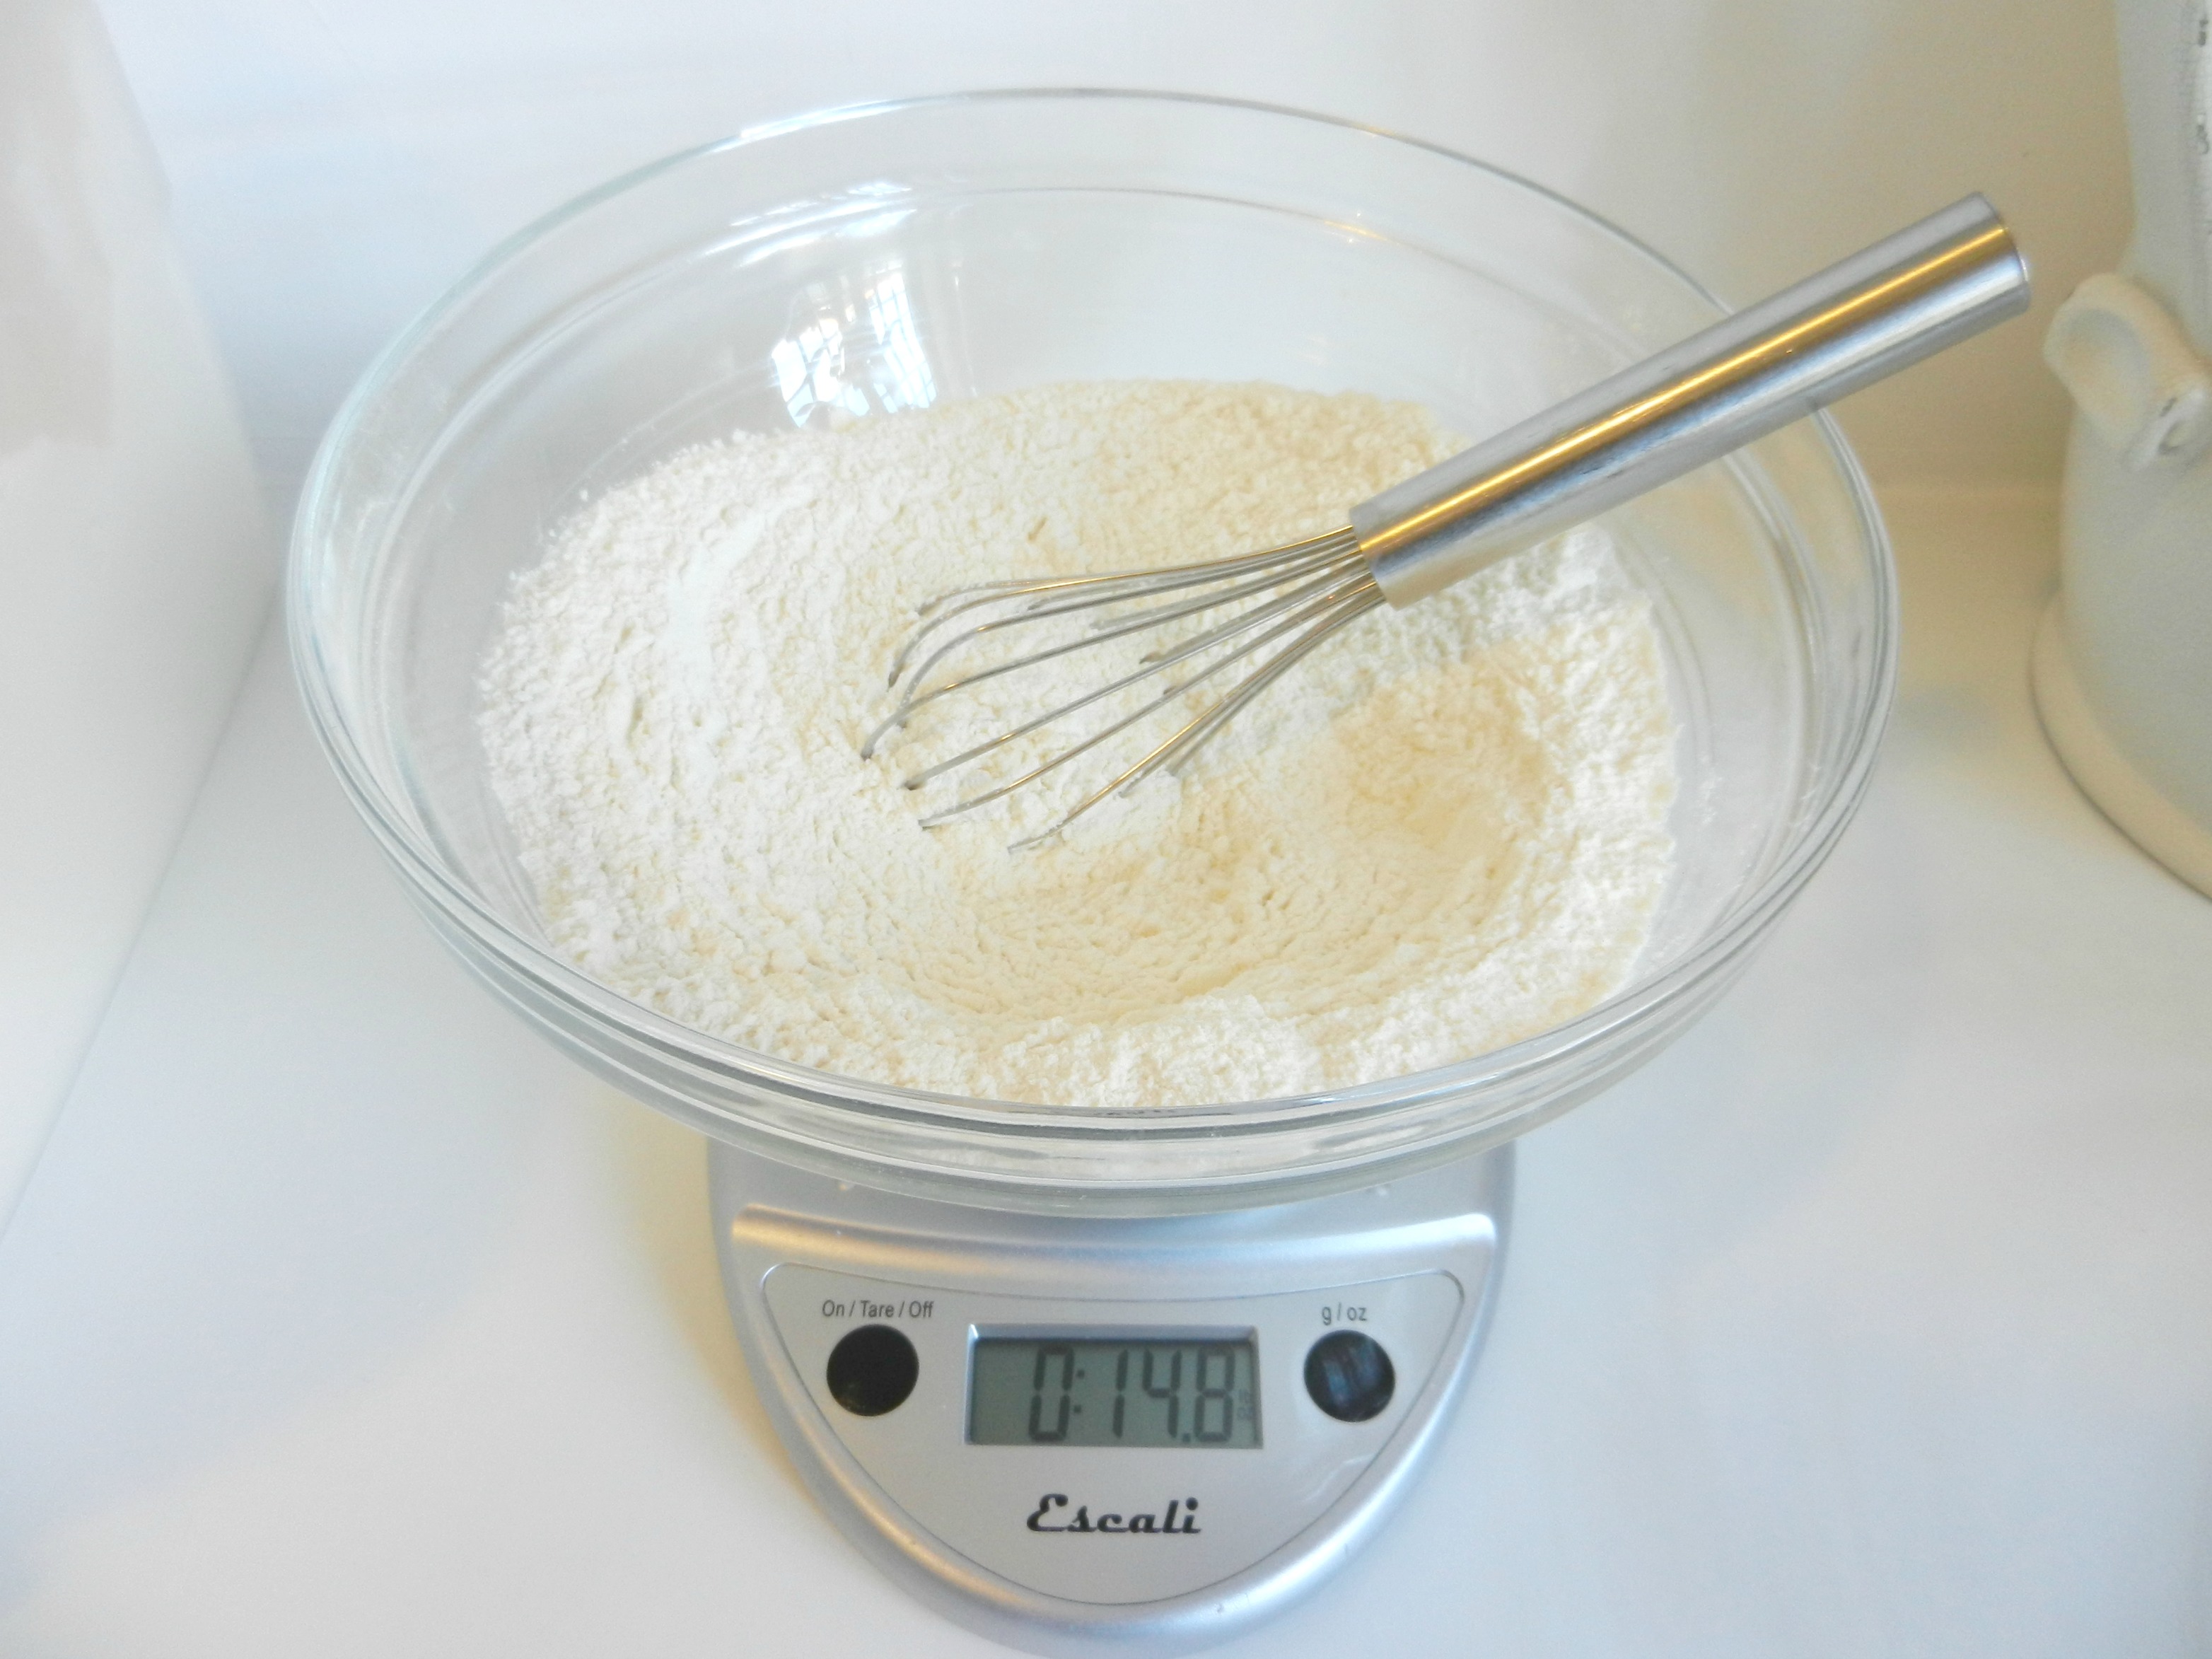
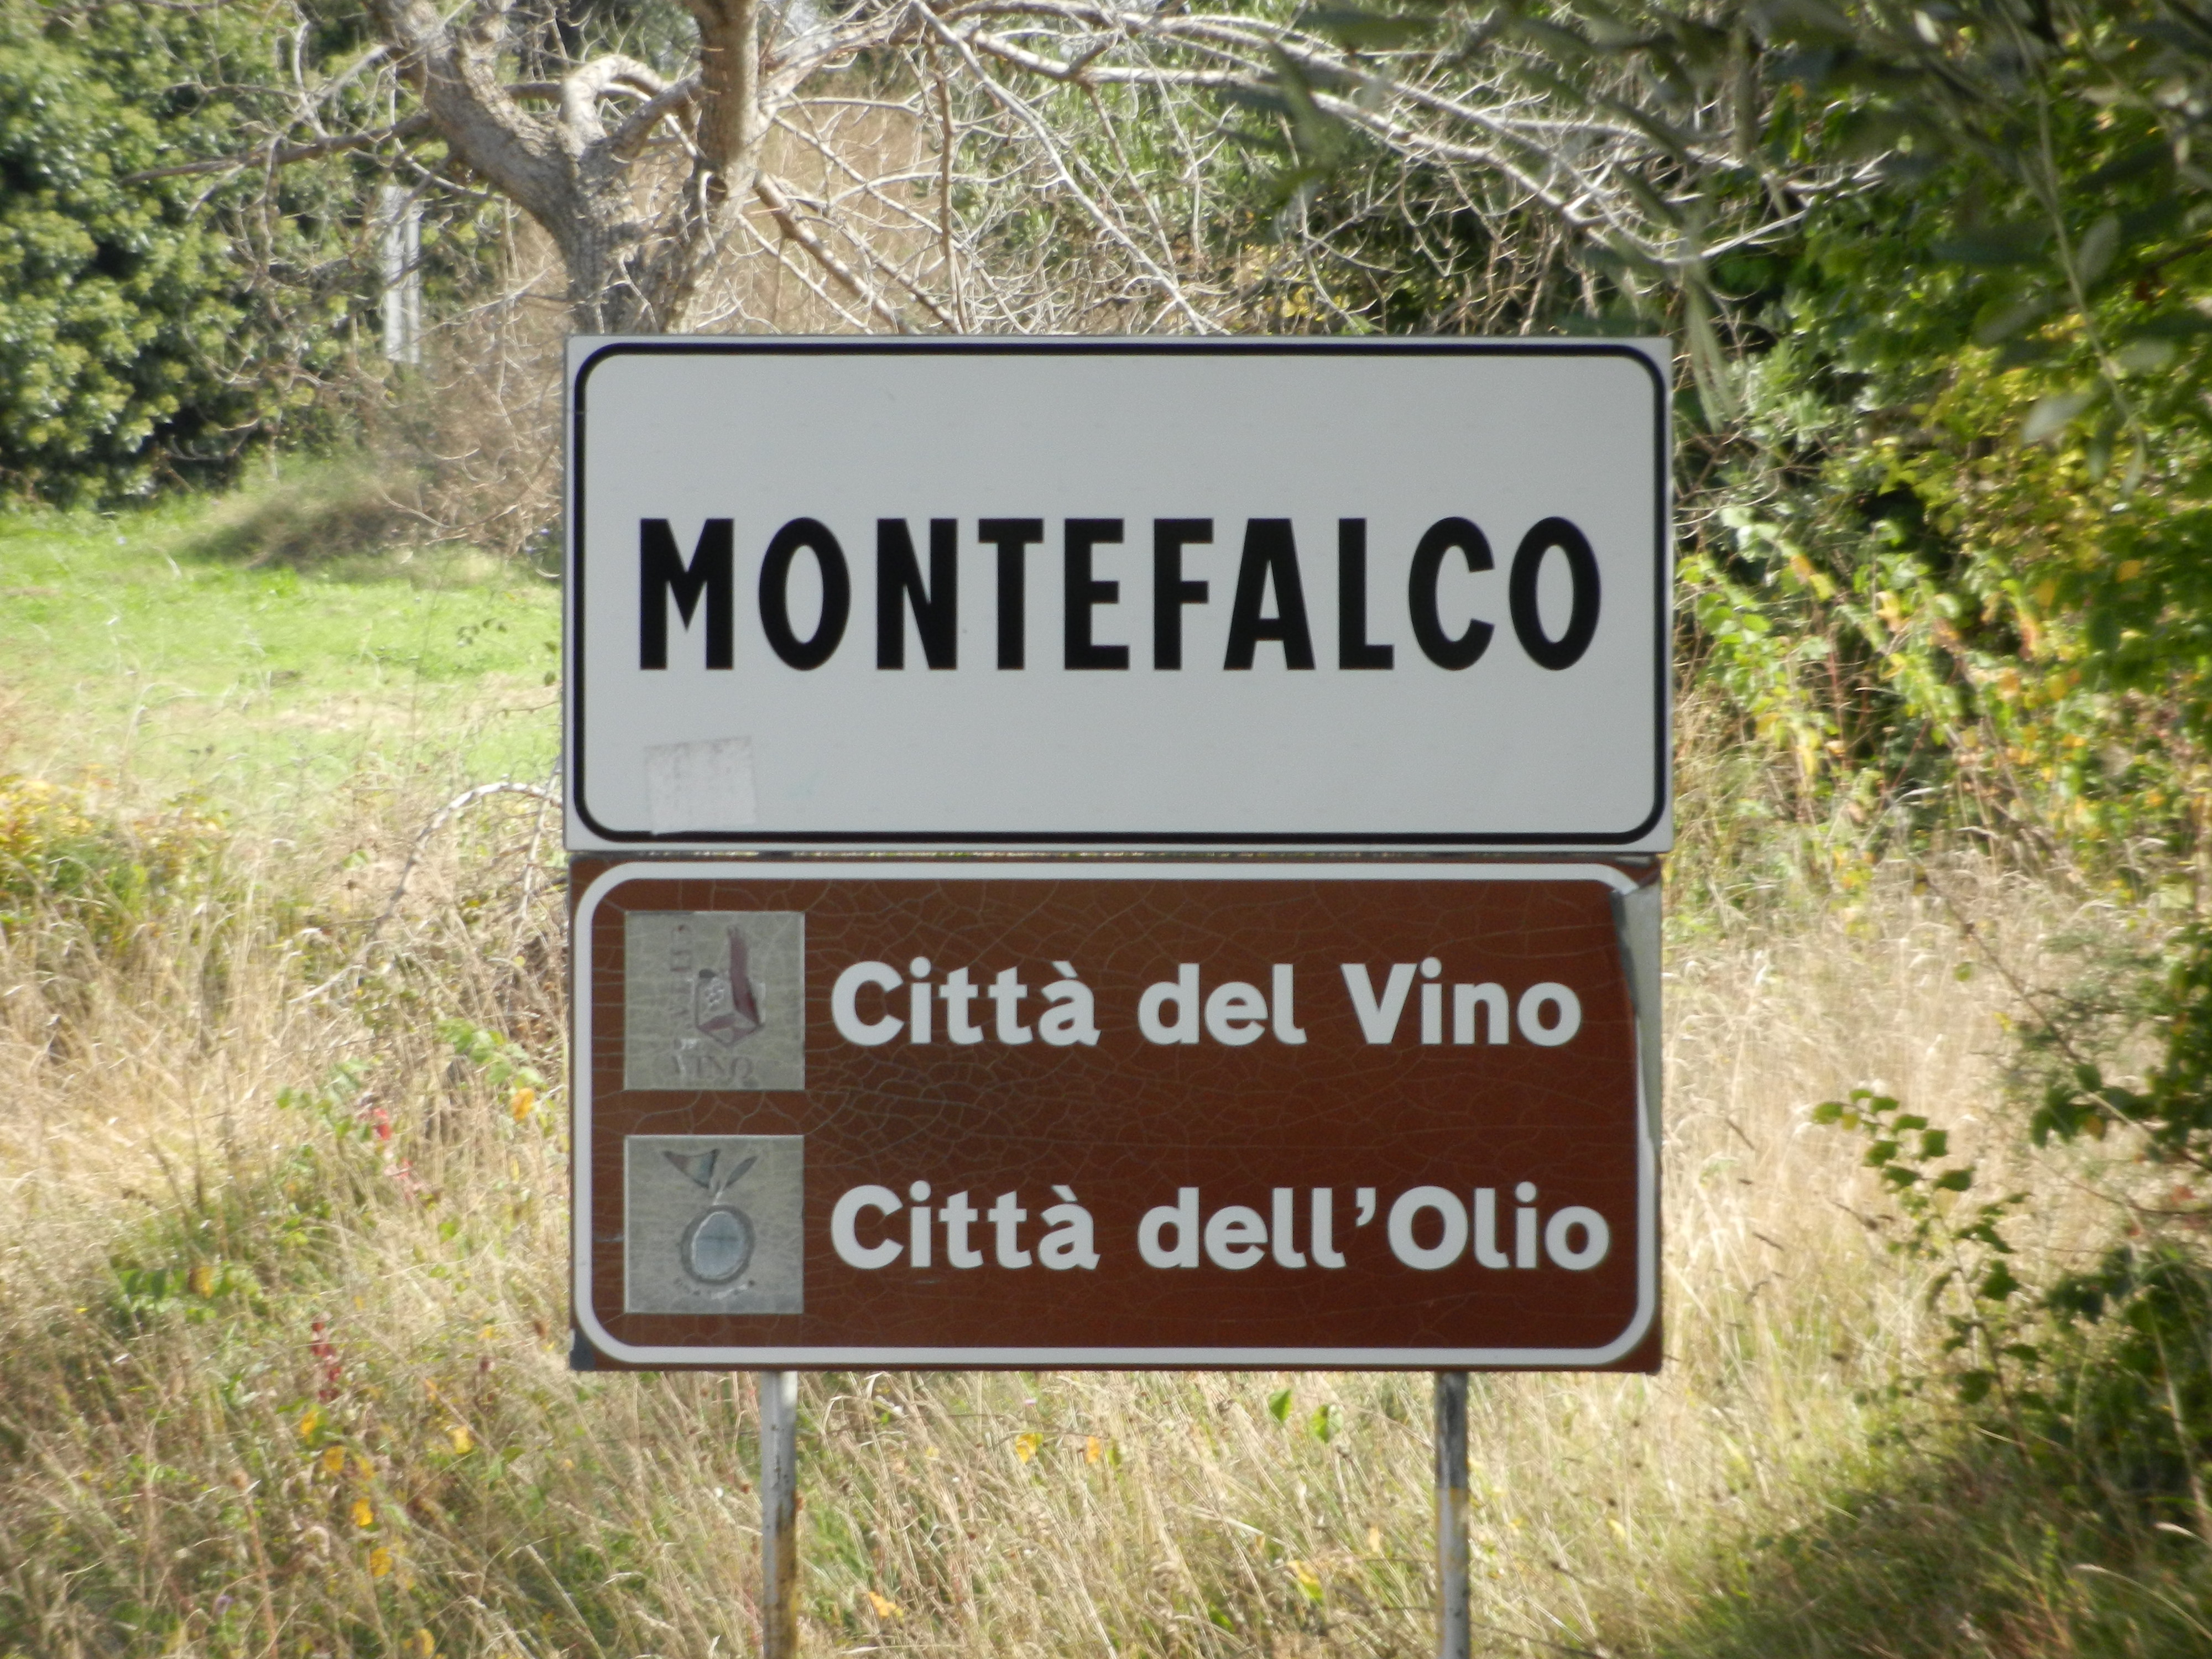
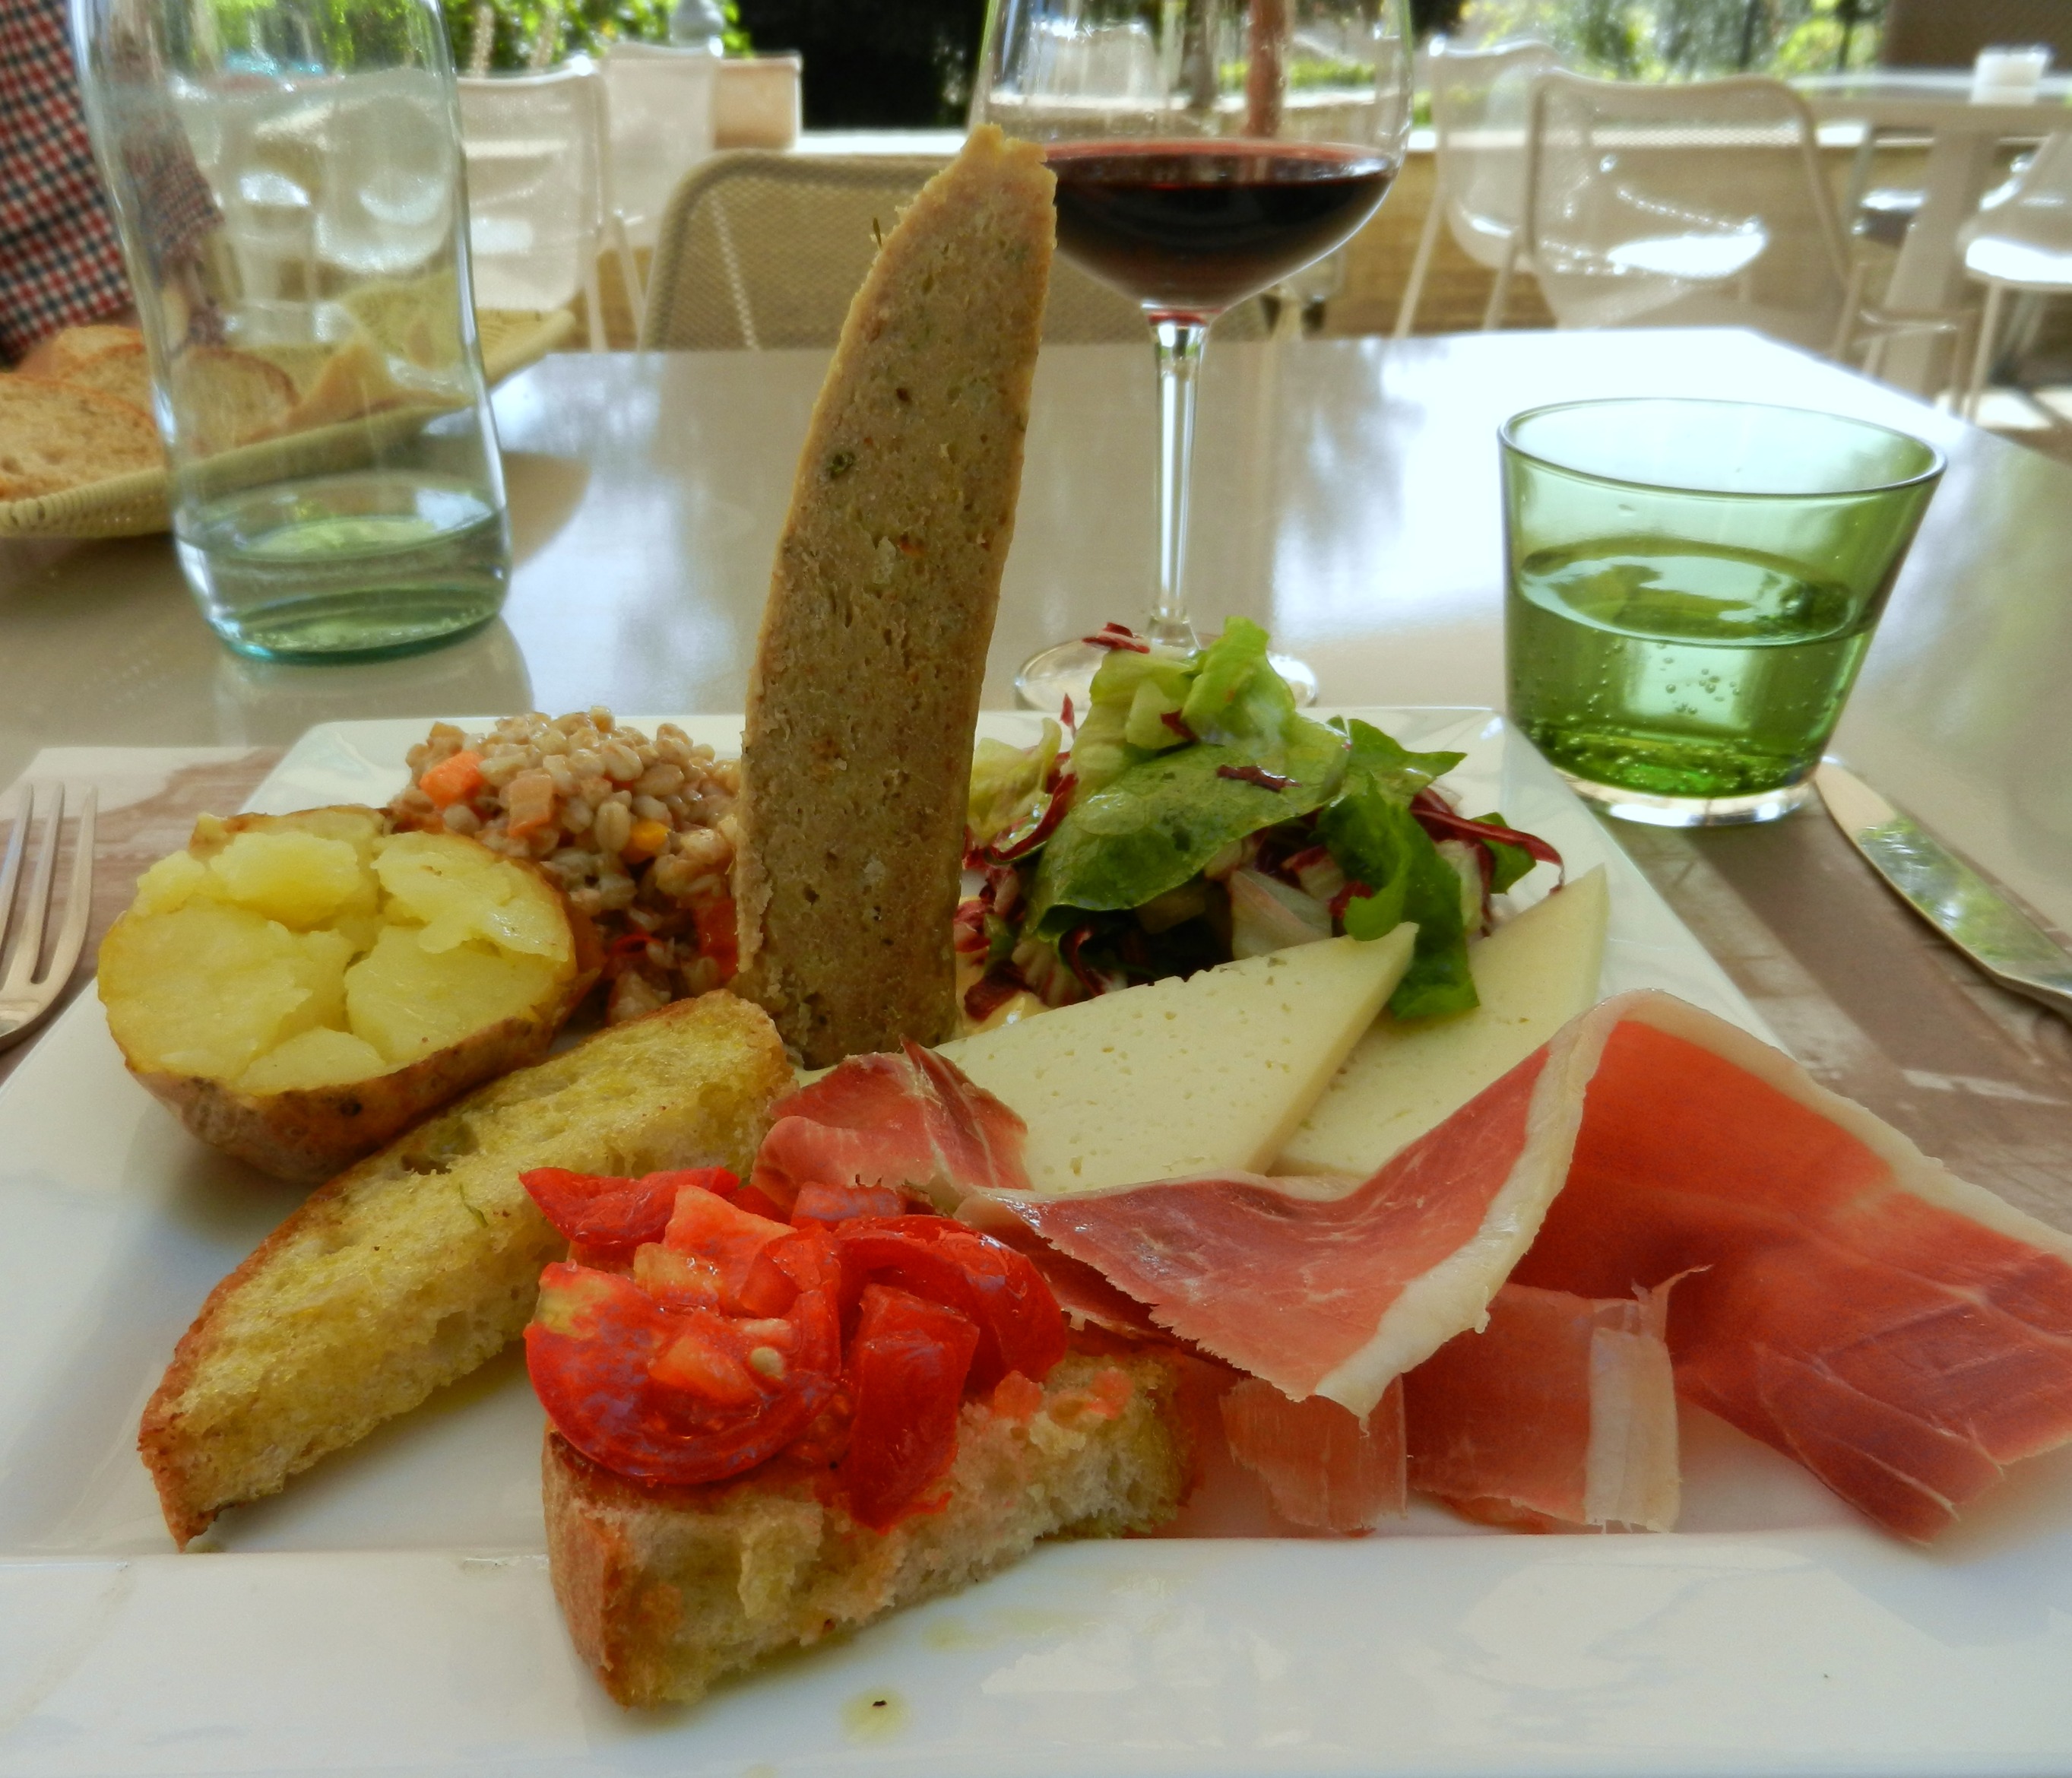
Sagrantino wines tend to be a bit robust which makes them complement the local cuisine of Umbria very well from Chianina beef to portobello mushrooms and black truffles. Sagrantino Passito is also produced in the hills of Montefalco and is a dessert wine similar to ice wine, but with a process more conducive to the climate of Italy. My family witnessed the complex undertaking of making this wine during our visit. They harvest the grapes and then put them on racks to partially dry to allow the sugar content to rise. Before they become too dry to release their sweet nectar, they are made into this wonderfully full-bodied dessert wine. This is not to be missed if you get the opportunity to try a glass for or with dessert. In fact, if you really like wine from Montefalco, you may indeed have to visit, because very little of the wine ever makes it out of Italy. With under 30 producers in the area, Montefalco wines are mostly consumed in the region. Surprisingly, I even find it difficult to find my favorite labels of Montefalco wines in Rome, and I came up comepletely empty after a hunt for Montefalco Rosso under any label during a recent trip to the U.S.

Though a visit to Montefalco would be enjoyable almost anytime of the year, late October to November is a particularly grapeswonderful time to explore the area. It is the time of la raccolta (harvest) for olives and grapes. In fact, Montefalco is a destination point on the Strada d’Olio (olive road) of Umbria. Many of the frantoi (olive presses) are open just during this season for those interested in seeing the process of how olives are harvested and then pressed into oil. For those “in the know,” it is also an opportunity to buy some of the premium first press oil during a visit. If you don’t make it to a frantoio, don’t worry because you’ll find places to taste and purchase the new oil along the streets of town. Just be sure to ask if the oil is from this year’s pressing — especially if the date is not indicated on the label.

Since I am admittedly a “foodie,” I can hardly think of a better place in Umbria to stop for a lunch or dinner. I have eaten at three restaurants in Montefalco, and each of them served a slightly different type of fare, but all were particularly memorable. Enoteca L’Alchimista is considered by many of the locals to be the top pick in town. It has a fairly casual atmosphere and serves food which highlights local ingredients and Montefalco wines. You’ll find mushrooms and truffles in season as well as beautiful cured meats and homemade pastas. If you are not sure what wine to order, ask the wait staff to suggest a wine which will pair well with your meal. For meat lovers, I suggest Ristorante Coccorone. As a primi, you can share a plate of tasty pasta bathed in a sauce of sagrantino wine, but save room for the secondi. Their specialty is large cuts of local Chianina beef prepared to order and served with great fanfare. Once you order, they roll the beef out on a scale so you can see how much it weighs. For a meal here, you might want to take a friend because the smallest cuts are about 800 to 1000 grams (a little less than 2 lbs.), and they are essentially meant to be divided among 2-3 people. Lastly, I recommend Locanda del Teatro. In good weather, they serve meals on a terrace overlooking the Appenine Mountains in the distance and the valley below. They offer many seasonal items which arrive artfully presented. On weekends, dinner reservations are a must at the best restaurants in town, so plan ahead.

Special of the Day at Locanda del Teatro

Special of the Day at Locanda del Teatro

Though most would not consider Montefalco a shopper’s paradise, several shops deserve attention.  Montefalco is the home of Tessitura Pardi, a high-end linen maker started by three brothers in 1949.  You will find more than one outlet for their beautiful wares along the cobbled streets of town.  Also look for shops selling sausages from nearby Norcia, wine shops selling Montefalco’s sublime offerings to Baccus and a store selling the beauty products of Oro di Spello (Gold of Spello), a company based just few miles away.  Whatever you do, just be sure to take in some of the grand views once you reach the edge of town.

This slideshow requires JavaScript.

Useful websites for planning your trip:

http://www.montefalcodoc.it/

http://www.stradadelsagrantino.it

http://www.stradaoliodopumbria.it/en/

http://frantoiaperti.net/it/oil-mills/?lang=en

http://www.enologicamontefalco.it/ (site for the yearly wine and food festival)

http://montefalcoapartments.com/

Easy Cranberry Sauce for the Holidays

Holidays mean traditions, and for me, Thanksgiving would not be Thanksgiving without homemade cranberry sauce.  This year, that means that I had to make my cranberry sauce early so it would be ready to pack in my suitcase later in the week. I plan to take it on a plane with me to share with our dear friends in Germany.  Am I crazy?  Well, maybe a little bit, but after you make this super easy recipe, you may never go back to serving the canned stuff again.  I hope this sauce will become a tradition for your family too!

The sauce keeps well in the fridge for at least a week.  You’ll hope there will be some left over because I promise that a sandwich made with this sauce, some cream cheese, and leftover turkey is truly divine!

It is as easy as this:

Pour the water and sugar into a medium to large saucepan over medium high heat.

Bring the mixture to a rolling boil while stirring occasionally to make sure all of the sugar dissolves.

Cranberries


Carefully add the cranberries.  The skins will begin to pop almost immediately.

Turn the heat down a little so the mixture is at a low boil for 11-12 minutes. Stir the sauce intermittently, making sure the sauce does not boil over.

DSC_0635


Turn off the heat and allow the sauce to cool to room temperature.

The sauce continues to thicken as it cools.  Place the finished sauce in your refrigerator until you are ready to use it.  It will easily keep for over a week if stored in the in the fridge.

finished sauce

Easy Cranberry Sauce

  • Servings: Yields about 4 cups
  • Difficulty: Very Easy
  • Print

DSC_0671

Ingredients:

  • 1 1/2 cups water
  • 1 1/2 cups sugar (10.5 oz. by weight)
  • 4 cups fresh or frozen cranberries, picked through to remove any bad berries (about 1 lb. or 454 grams)

Directions:

  1. Put water and sugar in a medium to large sauce pan and bring to a rolling boil, stirring occasionally to make sure the sugar fully dissolves.
  2. Carefully add the cranberries, and reduce the heat to medium.  The skins will begin to break almost immediately.  Stir occasionally and continue to cook for 11-12 minutes*.  (It is important to watch the sauce to make sure it does not boil over.)
  3. Allow the sauce to cool on the stove until room temperature.  It will continue to thicken as it cools.

Store in the refrigerator for up to a week.

*Cook for an extra two minutes if the cranberries were frozen.

A Few Notes:

Cranberry sauce goes well with ham as well as turkey.  I make this sauce for Thanksgiving, Christmas, and Easter.  Freeze a few extra berries during the holidays so you can make this sauce during other times of the year.


Pumpkin Bread with Apples and Cranberries

As Thanksgiving and Christmas approach, many of us become overwhelmed by our busy lives. Today I thought I’d share one of my favorite fall bread recipes that I keep on hand to serve my many guests who come to stay with me in Rome. I find it impractical to make a full breakfast for them everyday, yet I want to serve something special. This bread accompanied by some fruit and yoghurt makes for a pretty nice breakfast without lots of fussing in the kitchen. Even those of us who like to cook, also like to be able to sit down and enjoy our company without stressing over what to serve.

This recipe makes two loaves, so you will have a loaf to serve right away as well as one to keep in the freezer to pull out when unexpected company drops by. It is wonderful with both tea and coffee. The pumpkin and spices nicely complement the apples, and the crunchy topping makes it extra special.

In the recipe section, I listed the weight equivalents for the main ingredients. I much prefer to measure most ingredients this way because it guarantees consistency, is much quicker, and it also makes for fewer dishes to wash. If you have a food scale, give it a try! We now have two scales in my kitchen because the members of my family used to fight over the one scale we had when we were cooking together — especially during the holidays when we were each making a different dish.

Here is the step by step process for making this bread.

1.  Preheat the oven to 350 degrees.  Place flour, baking soda, salt, and spices in a bowl.  Stir with a wisk.


2.  In a separate bowl, combine the pumpkin, eggs, sugar, and oil.  Wisk together until smooth.


3.  Add the dry ingredients to the wet ingredients.  Use a silicon spoonula or a spoon to mix the dry ingredients into the wet ingredients. Do not overmix. (Most quick breads should not be mixed for long periods of time.  That is how you get those holes in your bread that look like little tunnels.)


4.  Gently fold in the chopped nuts, chopped apples, dried apples, and cranberries. Again, do not overmix.


5.  Put batter into prepared loaf pans. (You can butter and flour the pans or use baking spray.) The batter will be thick, so you’ll need to spread it out with a spatula to ensure even baking.  — You can again use your kitchen scale to make sure that the pans have about the same amount of batter in them.

DSCN6625


6.  Prepare the topping by stirring together the flour, sugar, and cinnamon.  Mix in the butter until the mixture resembles coarse meal.


Sprinkle this mixture over the top of the dough in both pans.

DSCN6626


7.  Place the loaves on a rack in the middle of your oven which you preheated to 350 degrees.  Bake the bread for 50 minutes to an hour.  A toothpick or bamboo skewer inserted into the bread should come out clean when the bread is done. (Cooking time will vary depending on your oven and the amount of humidity where you live.)

DSCN6628

Cool the loaves in their pans for about 40 minutes before removing to a wire rack. When the loaves are COMPLETELY cool, wrap in foil and store for a week in the fridge or several months in the freezer. (Slice the bread before freezing if you would like to be able to thaw just a few pieces at a time. It makes it easy to stick a slice in someone’s lunch or to pull a slice or two from the freezer when a friend stops by for tea.)


Pumpkin Bread with Apples and Cranberries

  • Servings: 2 loaves
  • Difficulty: easy
  • Print

DSC_0064

Bread Ingredients:

  • 3 c. flour (15 oz. by weight)
  • 2 tsp. baking soda
  • 3/4 tsp. salt
  • 2 tsp. cinnamon
  • 1 tsp. nutmeg
  • 1/4 tsp. allspice
  • 1/2 tsp. ginger
  • 1 can pumpkin (15 oz.) — NOT pumpkin pie filling
  • 3/4 c. vegetable oil
  • 2 c. sugar (14 oz. by weight)
  • 4 eggs
  • 2 c. peeled, cored, and chopped apples (I used Granny Smiths.)
  • 1/2 c. chopped dried apples (1.25 oz.)*
  • 1 c.  dried cranberries (5 oz.)*
  • 1 c.  pecans (4 oz.), chopped coarsely*

*Optional items — It is fine to include or omit these items depending on your personal taste.

Preheat oven to 350 degrees. Place flour, baking soda, salt, and spices in a bowl. Stir with a wisk. In a separate bowl, combine the pumpkin, eggs, sugar, and oil. Wisk together. Add the dry ingredients to the wet ingredients. Use a silicon spoonula or a spoon to mix together. Do not overmix; batter should be a bit lumpy. Gently fold in the chopped nuts, chopped apples, dried apples, and cranberries. Put batter into prepared loaf pans (buttered and floured or sprayed with non-stick spray).

Topping Ingredients:

  • 1 T. flour
  • 1/3 cup sugar (2.25 oz.)
  • 1 tsp. cinnamon
  • 1 T. unsalted butter, softened

Prepare topping by stirring together the flour, sugar, and cinnamon.  Mix in butter until the mixture resembles coarse meal.  Sprinkle over the top of the dough in the two loaf pans.

Place the loaves on a rack in the middle of oven, preheated to 350 degrees.  Bake the bread for 50 minutes to an hour. A toothpick or bamboo skewer inserted into the bread should come out clean when the bread is done.

Cool the loaves in their pans for about 40 minutes before removing to a wire rack. When the loaves are COMPLETELY cool, wrap in foil and store for a week in the fridge or several months in the freezer. (Bread can be sliced before freezing so you can thaw a few slices at a time.)

A Few Notes:  

I recommend buying your dried cranberries from Nuts.com.  Their dried cranberries are whole and actually taste like real cranberries.  I won’t mention other brands, but let’s just say that nuts.com’s cranberries are much better than what you can usually find in the grocery store, and they also don’t contain sulfites.  (This company is not sponsoring my blog.) I also purchase my dried apple pieces and many other items from them.

Easy Applesauce in a Crock Pot or Slow Cooker

Since I grew up in the state of Washington, I cannot help but think of apples when I think of fall.  During my childhood, the change of weather from summer to cool and crisp days meant that apple treats would soon be on their way.  My siblings and I collected apples from the trees in our yard and brought them to my mother as a subtle suggestion. She received them warmly and made pies, apple crisp, and heavenly cinnamon apple sauce.

My mother always made her applesauce in a dutch oven on the stove, which I also did for many years.  This method required remembering to check on the apples intermittently over a long period of time in order to stir them and to make sure the liquid in the pot had not completely evaporated.

This year I decided to see if I could simplify the process by using my slow cooker instead. Needless to say, it turned out great!  I almost felt guilty about how easy it was. Here is what I did:

apple

1.  Quarter and core apples (I use several varieties) and place in your crock pot.  The number of apples will vary depending on the capacity of your slow cooker.

2.  Add 3/4 cup of water, 1 tsp. lemon juice, and  3-4 cinnamon sticks to the apples.

3.  Put on the lid and turn your slow cooker to HIGH for 4 1/2 to 5 hours.  Do your laundry, read some books to your kids, or take a nap.  When you wake up, your house will smell like fall, and your family and friends will think you spent all day in the kitchen.

DSCN6604

4.  Turn off the cooker, and gently spoon small portions of the cooked apple mixture into a food mill fitted with the fine disk and placed over a bowl.  Remove and discard the cinnamon sticks as you come across them.  Turn the crank, and the skins will separate from the sauce.  If the mill seems hard to turn, give it a few turns in the opposite direction before resuming.

masher

5.  Wait for the applesauce to cool before placing in freezer containers or your fridge. The sauce will keep up to a week in the refrigerator or for several months in the freezer.  I don’t add any sugar to my sauce, but you can add a little brown sugar at the end if you feel it is too tart.  The flavor and tartness can vary quite a bit, depending on the types of apples you use.

DSCN6605

A Few Notes:

If you like your applesauce to be very light in color, peel the apples before cooking them.  The skins impart some color to the sauce.  If you do not have a food mill, you can use a potato masher instead.  Just be sure to PEEL, quarter, and core the apples before cooking.  Then mash the cooked apples to the consistency you like.

Easy Applesauce in a Crock Pot

  • Difficulty: easy
  • Print

DSCN6606

Ingredients:  

  • Several pounds of apples (various types), cored and quartered
  • 3/4 c. water
  • 1 tsp. lemon juice
  • 3-4 cinnamon sticks

Add all ingredients to a slow cooker, cover, and turn to HIGH for 4 1/2 to 5 hours. When the apples have cooked down, turn off the cooker. Place a food mill which has been fitted with the fine disk over a bowl. Slowly spoon in the cooked apples and turn the crank to push the pulp into the bowl below. Remove and discard the cinnamon sticks as you come across them. Every once in a while, turn the crank in the opposite direction to scape the peels away from the disk.

Stir in a little brown sugar if you think the sauce is too tart. Allow to cool to room temperature. Place in the refrigerator for up to a week or store in containers in the freezer for several months.

Ligurian Pasta with Pesto, Tomatoes, and Potatoes

In honor of Columbus Day this week, I decided to post a recipe for a typical dish found in the region of Liguria. Whether you are a fan of Cristoforo Colombo (Christopher Columbus) or not, he is an important figure in Italian history. The Ligurian city of Genoa was his birthplace and the birthplace of pesto alla Genovese. Travellers consider Liguria to be the Italian Riviera. One can hardly resist visiting picturesque Portofino, the Cinque Terre (five pastel-washed towns perched high above the sea), and my personal favorite, Portovenere.

It was on a sailboat trip to Portovenere and the Cinque Terre that I learned how to make this recipe from our skipper, Daniella.  According to Daniella, this pasta dish is normally served with tomatoes in the summer and potatoes in the winter.  Since she likes both, she taught me how to make it with tomatoes AND potatoes. It might sound strange to put potatoes with pasta, but there are quite a few dishes in Italy with potatoes in the sauce.  My family loves it; just give it a try!

Ligurian Pasta with Tomatoes, Pesto, and Potatoes

  • Servings: 4
  • Difficulty: easy
  • Print

Ligurian Pasta

Ingredients:

  • 1 lb. (450 – 500 g.) fresh trofie or linguine pasta (12 – 14 oz. dry pasta can be substituted)
  • 1-2 medium potatoes
  • ½ cup pesto (see recipe below or you could use prepared pesto – but remember, “fresh is best”)
  • 2 cups cherry or grape tomatoes, sliced in half
  • 1/2 cup reserved pasta water
  • Salt and pepper to taste
  • Freshly-grated Parmesan for serving

Directions:

Bring a large pot of water to boil over high heat.  Add about 2 teaspoons of salt per quart of water. (Unsalted pasta water makes the pasta bland. — (Don’t worry, you won’t ingest all of that salt!) Peel the potato.  Slice in half lengthwise, then slice those pieces again lengthwise (see picture below). Cut small quarter-inch thick slices of the potato and add to the water that is coming to a boil.*  Slice the 2 cups of tomatoes in half and set aside.  When the water boils, add the pasta and cook until al dente.  Package instructions for pasta usually tell you to cook the pasta for longer than it needs, so keep checking it. When ready, reserve about 1/2 cup of the pasta water and then drain off the rest. Immediately put the noodles and potatoes in a warmed bowl.  Add the 1/2 cup of pesto and then some pasta water a little at a time to make the pesto mix in more easily.  (You probably won’t need all the extra pasta water.) Add the fresh tomatoes and fold in.  Add salt and pepper to taste. Grate a little Parmesan over each serving at the table. Enjoy!

*If you use dry pasta, add the potato along with the pasta after the water reaches a boil.  Dry pasta takes longer to cook than fresh pasta.

It’s as easy as this:

Pesto alla Genovese

  • Servings: yields 3/4 - 1 cup
  • Difficulty: easy
  • Print

Pesto alla Genovese

Ingredients:

  • 1/4 cup pine nuts
  • 2-3 garlic cloves (NOT peeled)
  • 2 cups basil leaves (washed and dried — salad spinner works well for this)
  • 1/4 – 1/2 tsp. sea salt (Pecorino is saltier than Parmesan so amount will vary with cheese used.)
  • 1/2 cup olive oil (Ligurian is best for this recipe, but at least use a good quality olive oil.)
  • 3/4 cup freshly grated Parmesan cheese
  • 1/4 cup freshly grated Pecorino Romano cheese (regular Parmesan can be substituted)

Directions:

In a small skillet, toast the pine nuts on medium heat until slightly brown and fragrant. Set aside to cool.  While the pan is still warm, toast the garlic cloves (still in their skin) in the same skillet.* Allow to roast on the heat for about 6-8 minutes, turning occasionally. Garlic is done when it is fragrant and just slightly soft. Once the garlic is cool enough to handle, peel off the skin.  In the bowl of a food processor, put the basil leaves, cooled pine nuts, cooled garlic cloves, and salt.  While the machine is running, add the olive oil in a steady stream. Stop to scrape down the sides of the bowl and pulse again to be sure everything is combined. Remove the puree to another bowl and stir in the Parmesan and Pecorino. Cover the surface of the pesto with plastic wrap to prevent discoloration and place in the refrigerator until ready to use.**

Try pesto on sandwiches or pasta.  It works well as an appetizer when spread on toasted bread and topped with a slice of tomato.

*I cook the garlic a little just to mellow the flavor.  If you don’t have the time, you can just peel it and add it to the food processor without cooking it at all.

**Pesto may be frozen in small portions for several months or kept in the refrigerator for a few days.

It’s as easy as this:


A Weekend at the Arezzo Antique Fair


girl reading

Tuscany is perhaps the most visited region of Italy, and now you may find just one more reason to spend some time there. On the far eastern side of Tuscany sits the historic town of Arezzo, home of a monthly antique fair (Arezzo Fiera Antiquaria).  Fall in Italy is a wonderful time to take a DSCN6410
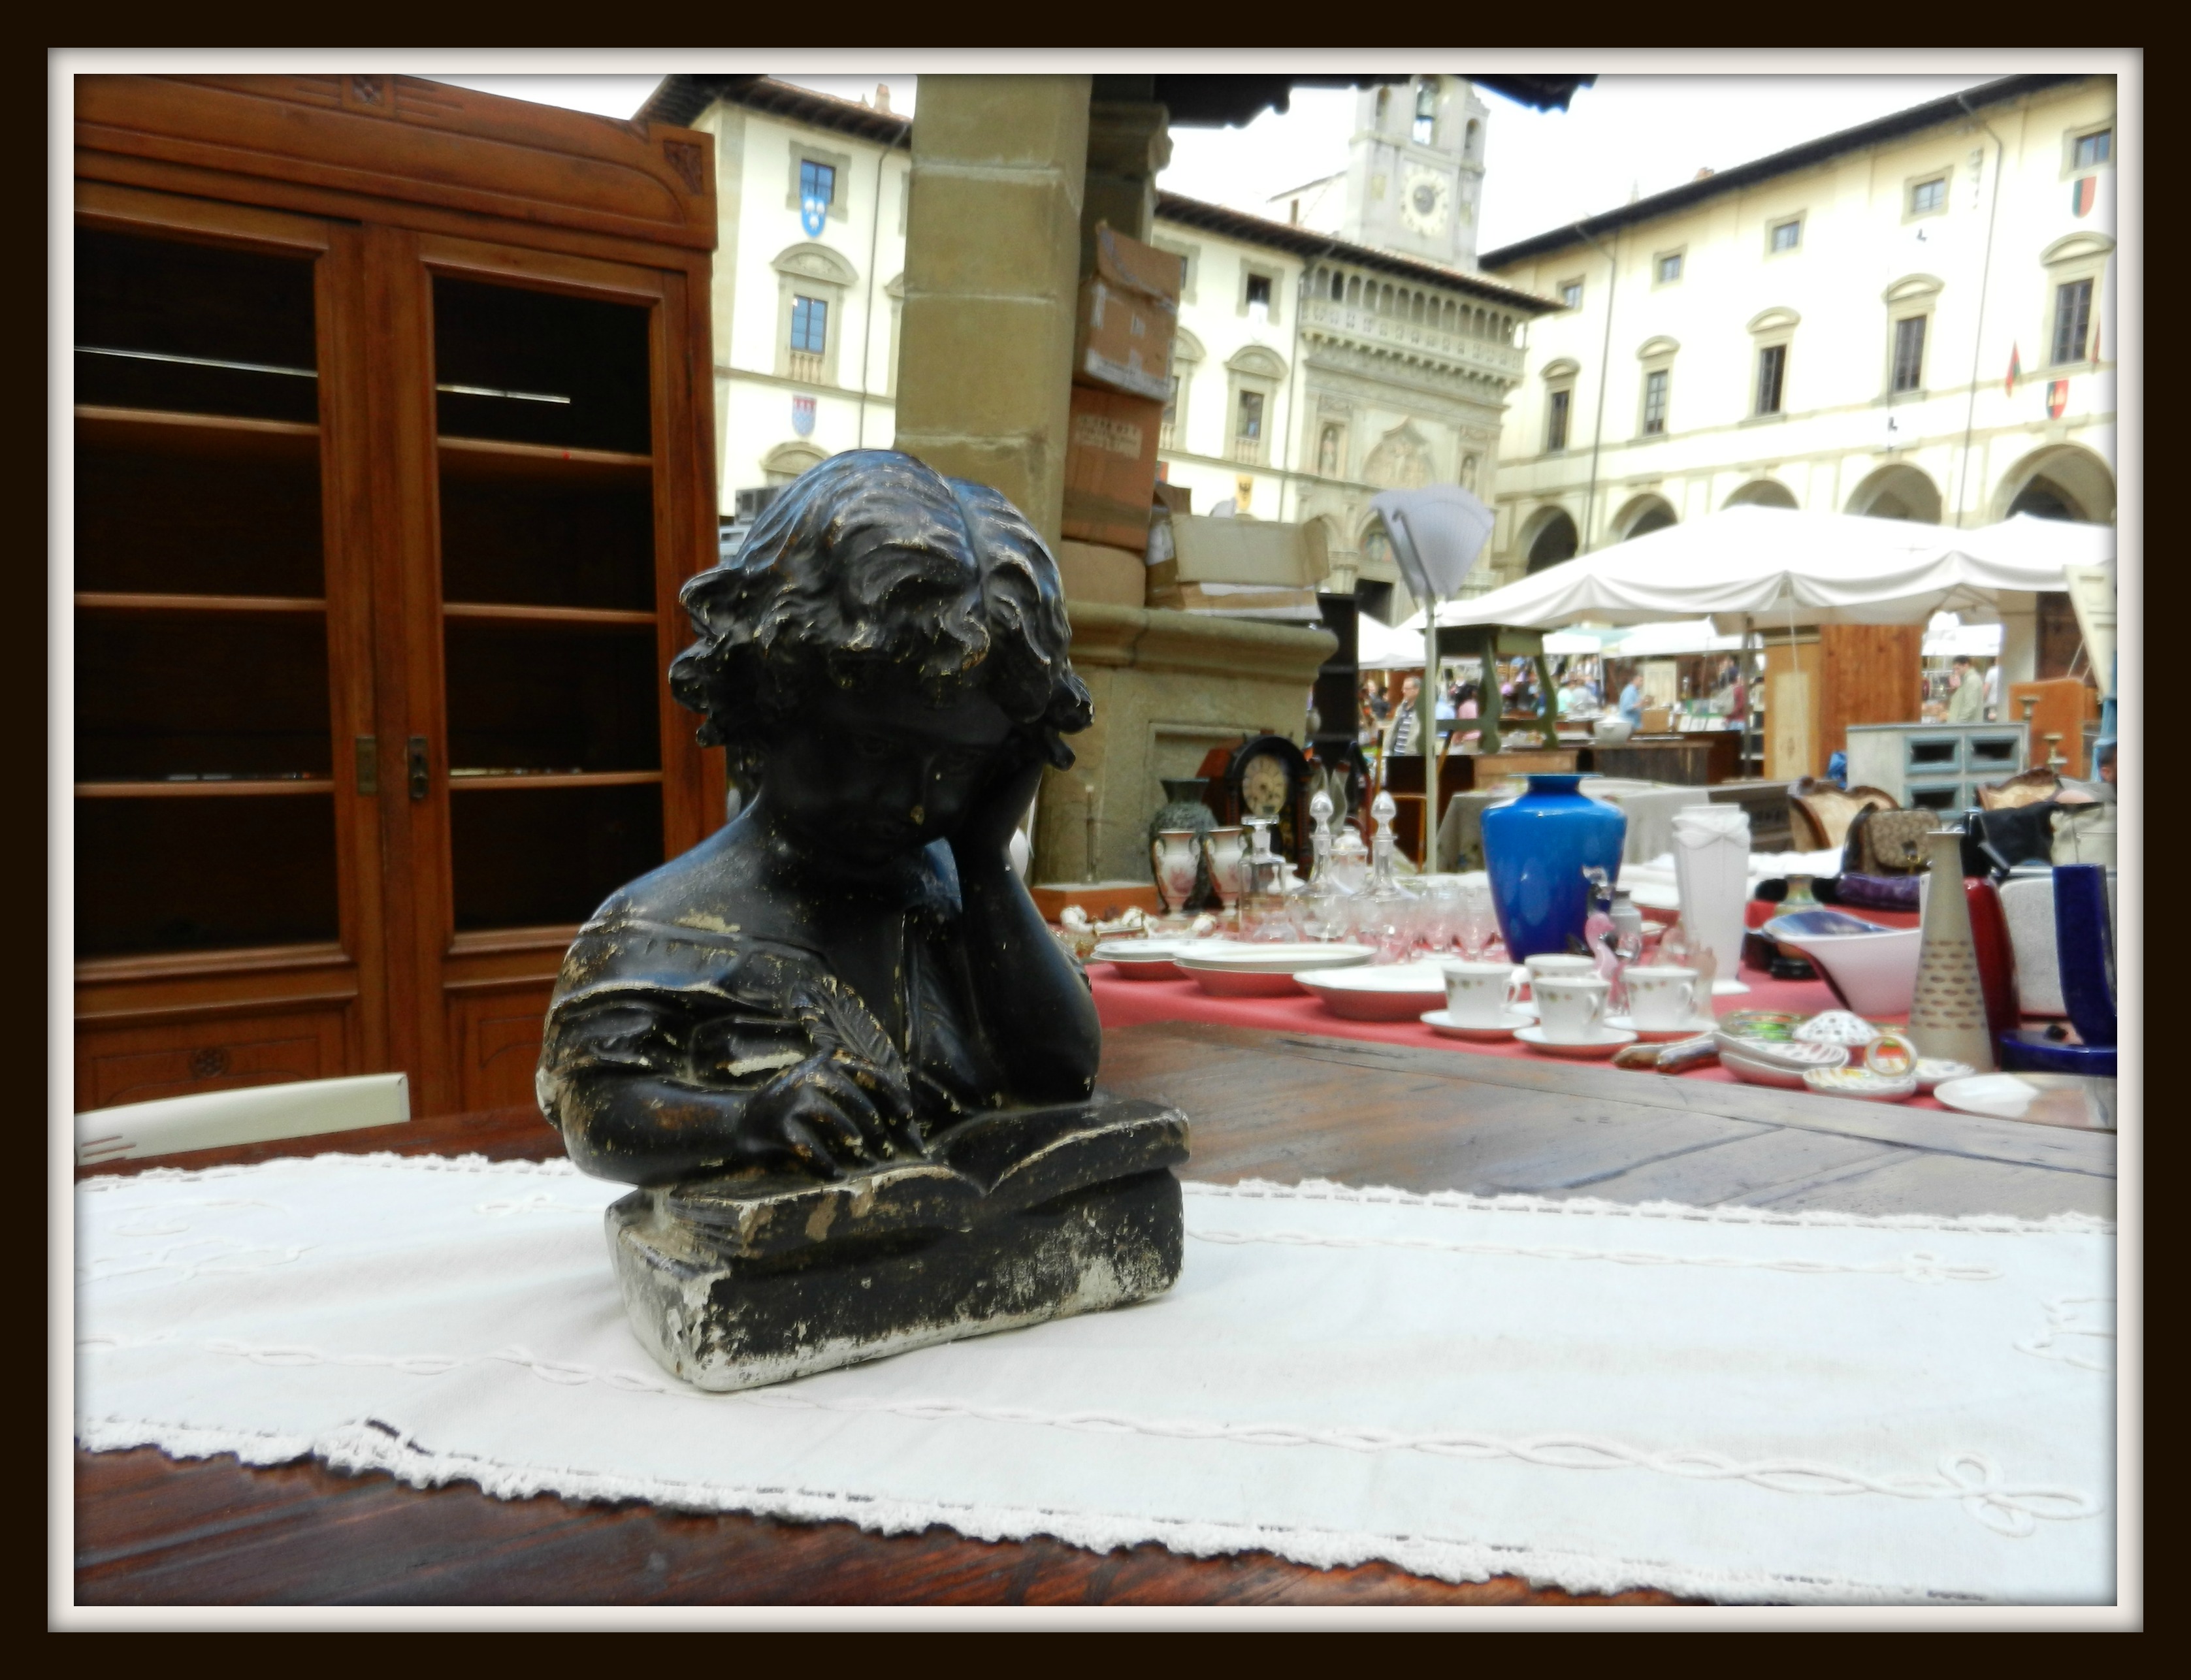
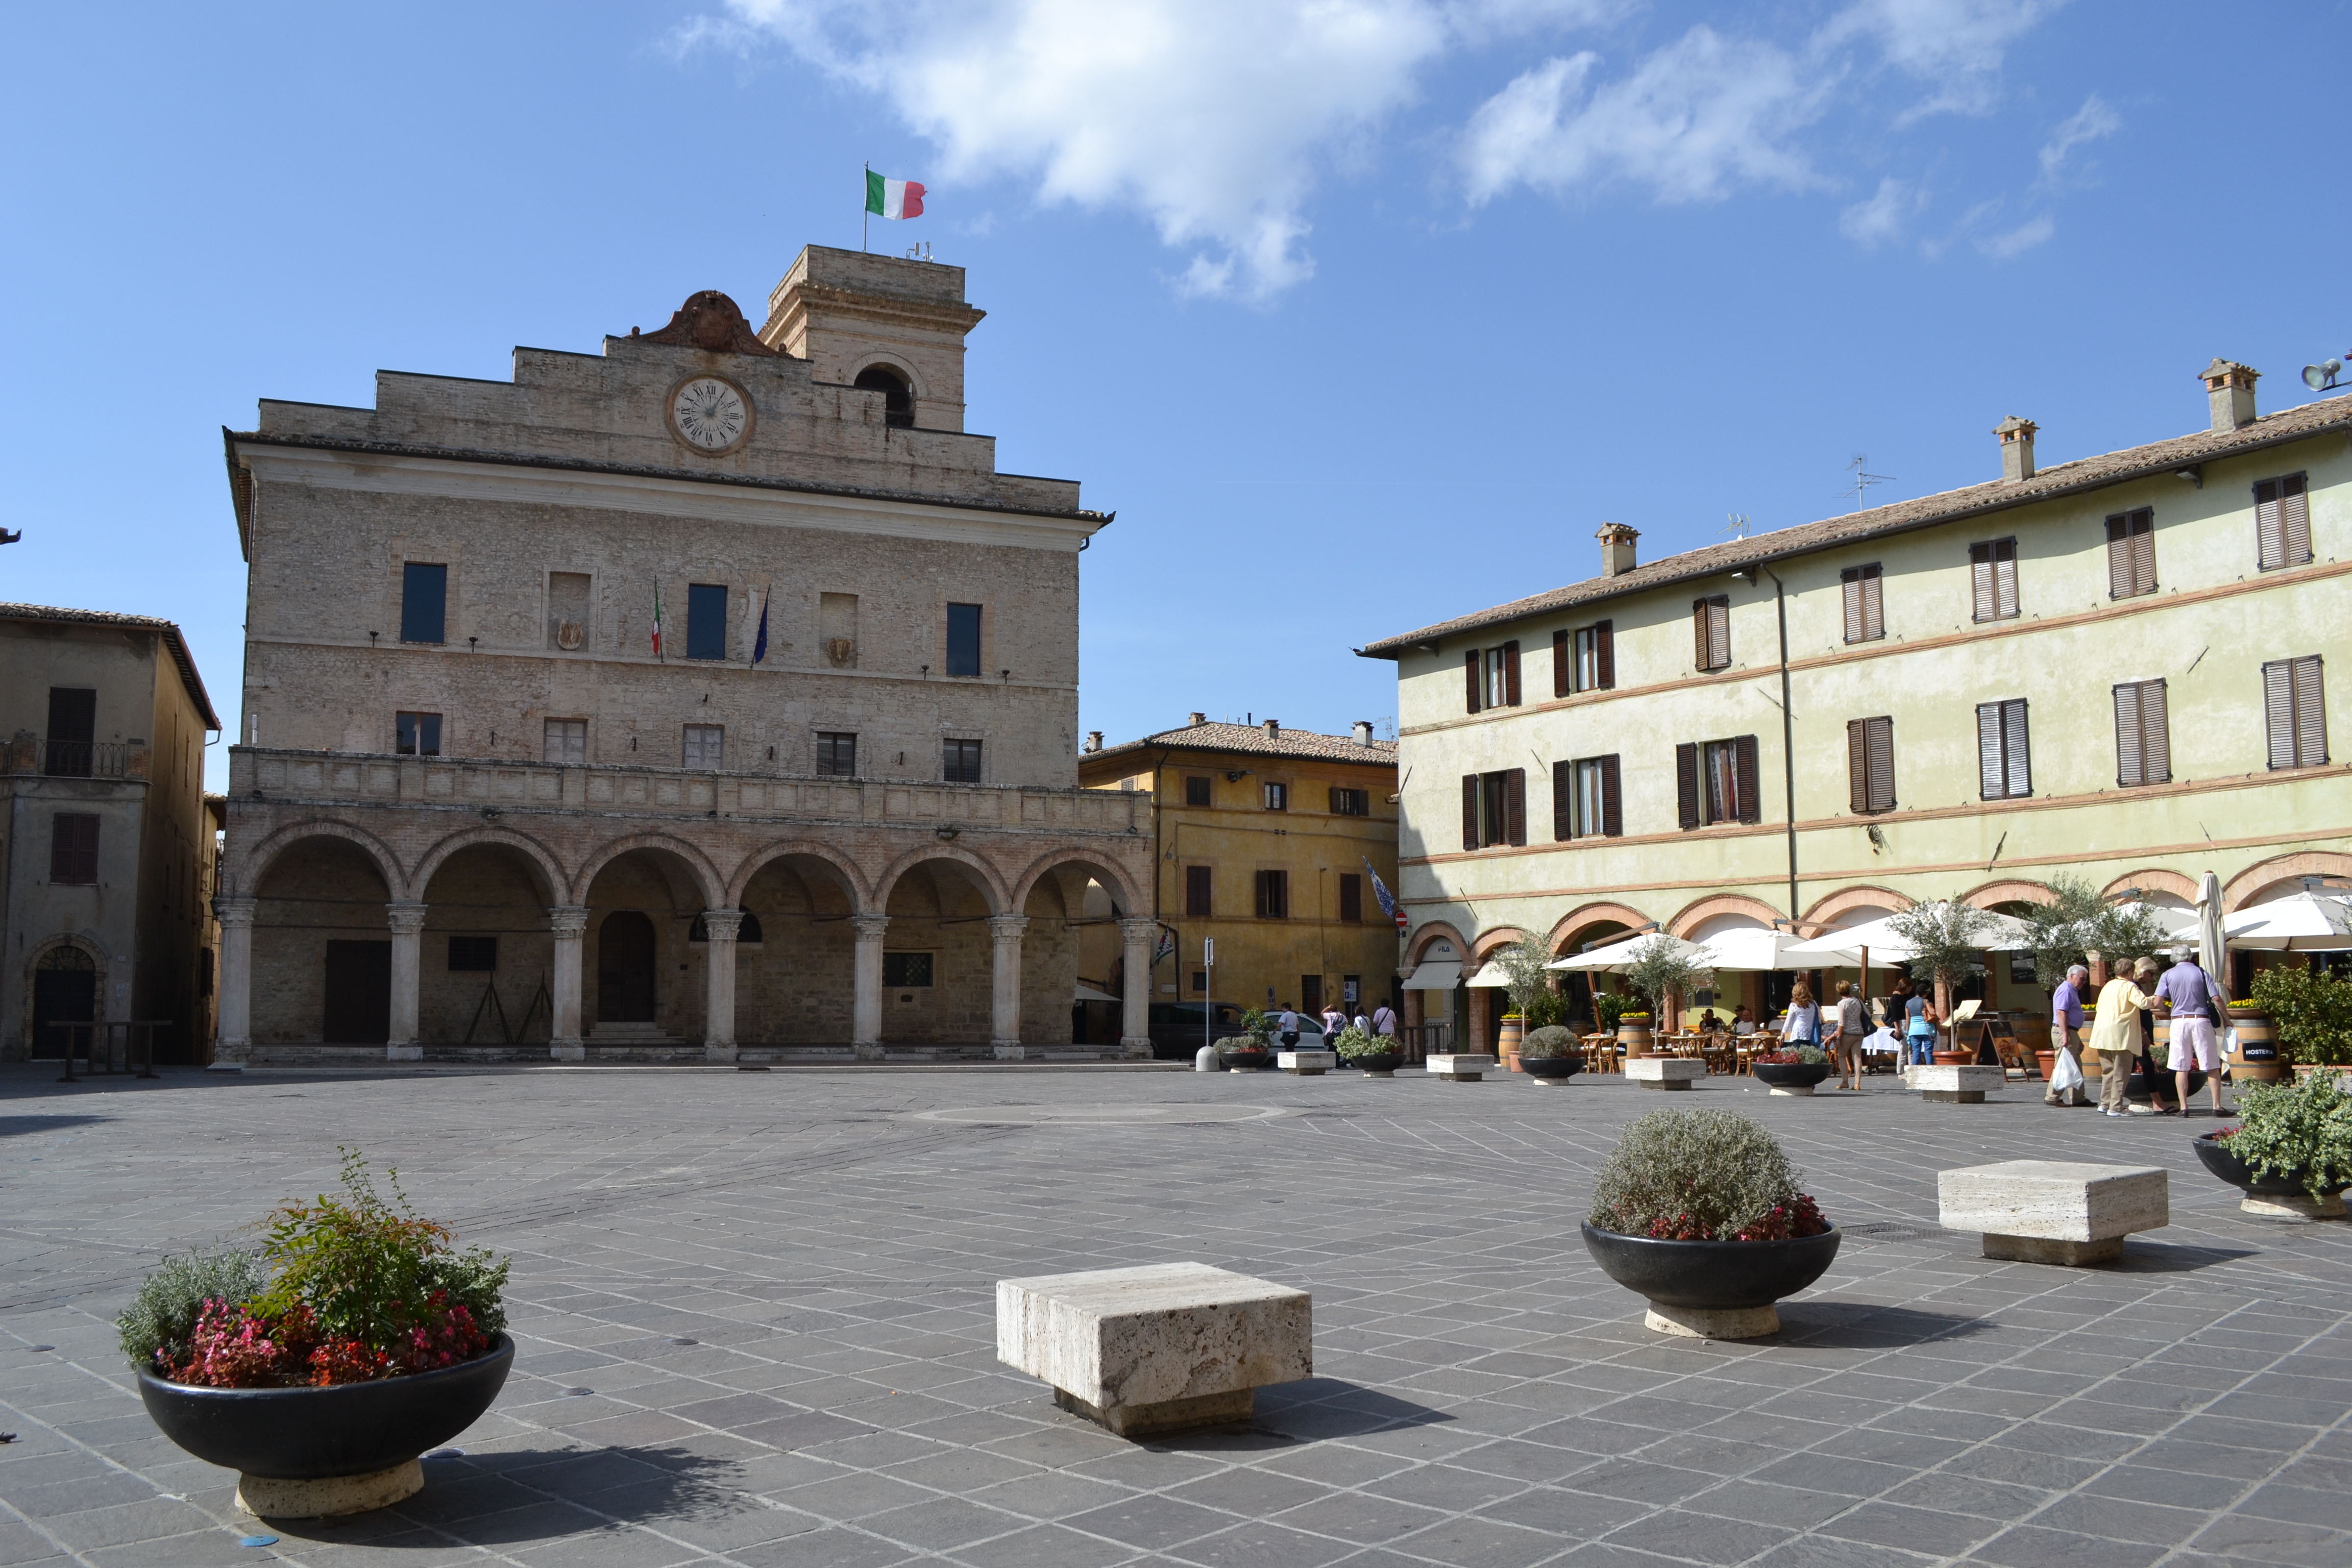
drive because of the cooler temperatures but abundant sun. Over the weekend, I decided to enjoy the season and make a visit to this special market. The trip from Rome took about two driving hours.  My husband and I knew when we were close because steady streams of people were headed in the direction marked “Centro.”  We set off in the same direction, making the typical stop for a cappuccino and cornetto, and then continued on our quest. Once we reached Corso Italia, a sea of tents and tables wound their way up the cobbled streets to Piazza Grande, the center of the market. From the main piazza, stalls spiraled out through the Renaissance passageways, making the hunt for treasure all the more fun.

One weekend a month, over 500 vendors from around Italy bring their wares to Arezzo.  From linens for one euro to marquetry furniture and paintings for thousands, there is something to tempt almost everyone. Cameos, pearls, fur collars, and vintage Louis Vuitton purses spark the interest of those seeking timeless fashion.  Antique pottery from Gubbio and Deruta draws the attention of others.  One vendor specializes in restored meat slicers. (Yes, you read it right — these are considered by some as a “necessity” in a land where salami is king.)  Another vendor just sells silver in every shape and form imaginable. Yet another didn’t seem to sell the same of anything; towel bars, rusty hinges, and copper pots spread across his table.


This slideshow requires JavaScript.


If antiques aren’t your thing, there are plenty of other clothing stores, designer jewelry shops, artisan handicrafts, and some beautiful Renaissance architecture to enjoy.  Giorgio Vasari, famous author of “Lives of the Painters,” was born in Arezzo, and his home can be visited on the north side of the city.  Georgio Bernigni’s Academy Award-winning film,  Life is Beautiful (La vita é bella) was filmed here (mainly in Piazza Grande) and gives testimony to the enduring charm of the city.

When you tire of wandering the streets, head to the 14th Century Church of San Francesco. Pews await you that will allow you to take a respite while enjoying Piero della Francesca’s cycle of frescoes, Legends of the True Cross. This is his largest and one of his finest works. For the hungry and general foodies, restaurants abound in Arezzo, specializing in delicious Tuscan fare.  Since Italian food is very regional, be sure to order something local to get the best quality.  Try a dish with black truffles or pappardelle al cinghiale (wide egg noodles with wild boar).  If you purchase one of those meat slicers, you can buy some finocchio salami and give it a test.  (Finocchio is a Tuscan salami with fennel — and my absolute favorite in Italy!)

The market is held every first Sunday of the month as well as the preceding Saturday.

Where: Arezzostall

Dates for the Remainder of 2014:

1st – 2nd November
6th – 7th December

How to get there:

There are regular regional trains that stop in Arezzo on the line from Rome to Florence.  By car, the trip takes about 2 hours from Rome or an hour and 10 minutes from Florence.

Fashion in the Fall — A Visit to the Micol Fontana Foundation

Fontana Foundation DressToday I headed for the heart of Rome to visit the Micol Fontana Foundation. Though I had a map and the address, I walked up and down the street several times and finally had to ask for directions.  The postman pointed me to a doorway with no sign indicating the proper address or a sign for the foundation.  On trust, I entered the building indicated and wandered down a dark corridor, up a set of stairs, and then rang a tiny buzzer next to another nondescript door.  When a woman came to greet me at the door, I knew that I was in the correct place. Bookshelves lined the walls in the tiny entry and glamorous women dressed in elegant gowns stared down at me from posters that lined the walls and touched the ceiling.  I recognized some of them as the female jewels of the 1950s and 60s. Ava Gardner, Grace Kelley, Elizabeth Taylor, and Audrey Hepburn all donned dresses with yards of fabric decorated with lace, beads, and tucks to highlight their figures. In another corner, I noticed a picture of Jackie Kennedy in a ball gown standing next to President John Kennedy.

The woman then guided me out of  the first room and along a hallway.  To one side, I passed silk wedding gowns with venetian lace and rows of tiny covered buttons reaching from the collars down the front or back of the dresses.  On the other side of the passageway were dresses more appropriate for a Hollywood cocktail party or an evening out at a club as envisioned in the movies of the 1950s.  Finally, I reached a light-flooded room with a wall of windows leading to a lovely terrace, hidden from the busy cobbled streets. This room was like a personal library of fashion by the Fontana sisters.  Books containing and commemorating their work over the years lay scattered across a table.  On the walls were drawings of their designs and pictures of the sisters with both family and some of their most famous clients.

Who were these sisters who became so sought after by the elite of Rome, Hollywood, and Washington, D.C.? The three Fontana sisters, Zoe, Micol, and Giovanna, grew up just outside Parma. Their mother was a seamstress as was their grandmother. As one sister, Micol, stated, “sewing was in our blood.”  From the age of 10, Micol was doing fittings for her mother’s clients. They would come to see her on Sundays after the 5:00 a.m. mass. Though their mother had a steady stream of customers keeping them busy, the sisters became restless as they grew older. With the approval of their parents (which didn’t come easily in those days), they set off for the city. When they arrived at the train station, they didn’t know whether to go to Milan or Rome, so Zoe, the oldest, decided to choose by whichever train came first.  It happened to be a train to Rome.

The sisters set up a workshop in Rome and soon were busy with work from the elite of Italy. Their big break onto the world stage of fashion came with the commissioning of the wedding dress of Linda Christian, a movie star, to another American actor, Tyrone Power.  They were married in Rome with cameras from all over the world snapping pictures and publishing them in magazines and newspapers.  From the well-publicized Rome event, the sisters gained the attention of Hollywood and eventually the First Lady of the United States, Jackie Kennedy.  Micol recalled how the bell rang one evening at her studio in New York, and to her surprise, it was President Kennedy and the First Lady.  That was the beginning of a long relationship with the Kennedys.  Jackie, evidently, would pick several dresses, and then her husband would help her choose which one to wear at which event.

Though the client list was extensive and impressive, my attention drifted to the beautiful dresses in the third room.  From the table, I could see skirts in all hues glittering in the light.  Haute couture gowns designed by the Fontana sisters from the 1940s to the 1990s lined the walls.  One of Micol’s nieces pointed out a dress made for Audrey Hepburn.  Tiny beads of venetian glass (in the days before swarovski crystals) were stitched in scroll patterns around the silk chiffon skirt.  The dress came from the period of time when Audrey Hepburn was filming Roman Holiday and her romance with Gregory Peck.  Behind me, another full length dress of blue silk velvet caught my eye. Flowers fashioned after persian floral designs stretch across its bodice and down to the skirt in threads of real gold.

As I prepared to leave after my tour, I felt a bit sad.  The days of such beautiful dresses and craftsmanship may be coming to an end.  It is now difficult to find the materials and the craftspeople to create such beautiful beadwork and gowns — even in China. The artisans who labored over these creations were skilled Italians, but the workshops are now empty.  The task set before the Micol Foundation is to keep their legacy alive through teaching seminars and holding competitions.

Though not open to the public on a daily basis, tours can be arranged through the foundation website.  It is an opportunity well-worth pursuing.  http://www.micolfontana.it/eng